Streaming Learning Center Where Streaming Professionals Learn to Excel

Related Articles


This tutorial teaches you how to connect a microphone and soundboard to a camcorder and DSLR for live and on-demand video production. This article was derived from a lesson in my Live Streaming Bootcamp course, which teaches you the skills and techniques that optimize the quality of your webinars and live streams. Click here for more detail on the course.
Though all camcorders include an internal microphone you typically never want to use it for actual production. If you’re shooting a meeting or webinar, lavalier microphones will deliver better quality whether connected through the soundboard or directly to the camera. For a concert or similar event, you’ll almost always want to take audio from the soundboard.
So, if you want to produce high-quality audio to go along with your video, you need to know how to connect a microphone or soundboard to your camcorder. This tutorial will show you how, starting with a traditional camcorder with XLR connectors and then for a DSLR with a 1/8” connector.
Contents
Audio Basics
Let’s start with some basics.
XLR vs. 1/8” (3.5 mm)
Most microphone connectors are either XLR connectors, on the left in Figure 1, or 3.5mm connectors (also called 1/8” connectors) on the right. Most professional microphones use XLR connectors which is why most professional camcorders have XLR plugs, while consumer camcorders and DSLRs have 3.5mm plugs. While there are some high-quality mics with 3.5 mm connectors, I think it’s best to work with XLR equipment and, if your camcorder has 3.5mm plugs, use an adapter or device like the Comica audio mixer discussed later in the article to input the XLR audio and output a 3.5mm connector.
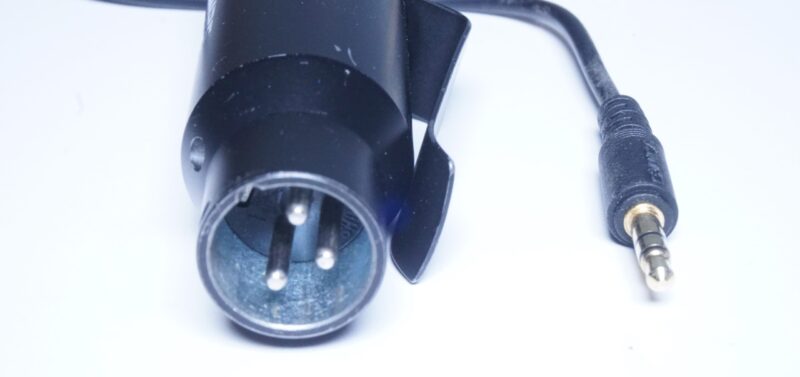
Note that all XLR connectors are mono, while the two black lines in the 3.5 mm connector transmit the left and right signals. If you need true stereo, you’ll need two XLR connectors, one from each source. However, for most talking head audio, stereo doesn’t really matter so you can input a mono signal so long as you route it to both channels in your camera. You’ll learn how to do that during the first tutorial.
Most Lavaliere Mics are Condenser Microphones that Need Power
There are two types of microphones, condenser and dynamic. Condenser microphones are generally more sensitive and can be produced in a much smaller package so are used in most lavaliere microphones. Note that condenser microphones need electric power to operate. So, if you’re connecting a lavaliere microphone directly to your camcorder, chances are that you’ll need to power it.
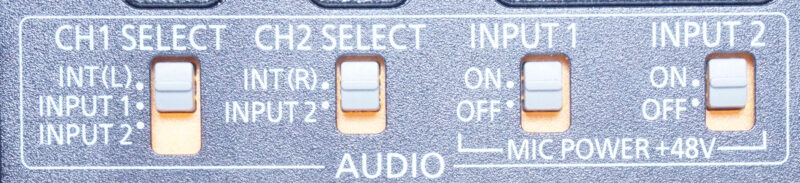
Specifically, if you’re working with an unpowered XLR microphone, you’ll need to supply 48-volt Phantom power, which most professional camcorders can provide. Figure 2 shows the audio controls from my Panasonic camcorder; on the right are the selector switches that supply 48V Phantom power to an unpowered microphone. On the other hand, if you’re working with a battery-powered microphone like many on-camera mics, you don’t need to supply external power; that’s what the battery does. In these cases, you would turn Phantom power off.
Note that condenser microphones with 3.5 mm connectors require what’s called plug-in power, which is about 2.5 – 5 volts. Many, but not all, 3.5 mm plugs on camcorders and computers supply plug-in power; for example, the plug on my Sony a6300 does while the plug on my old Canon Vixia does not.
Line vs. Mic Power
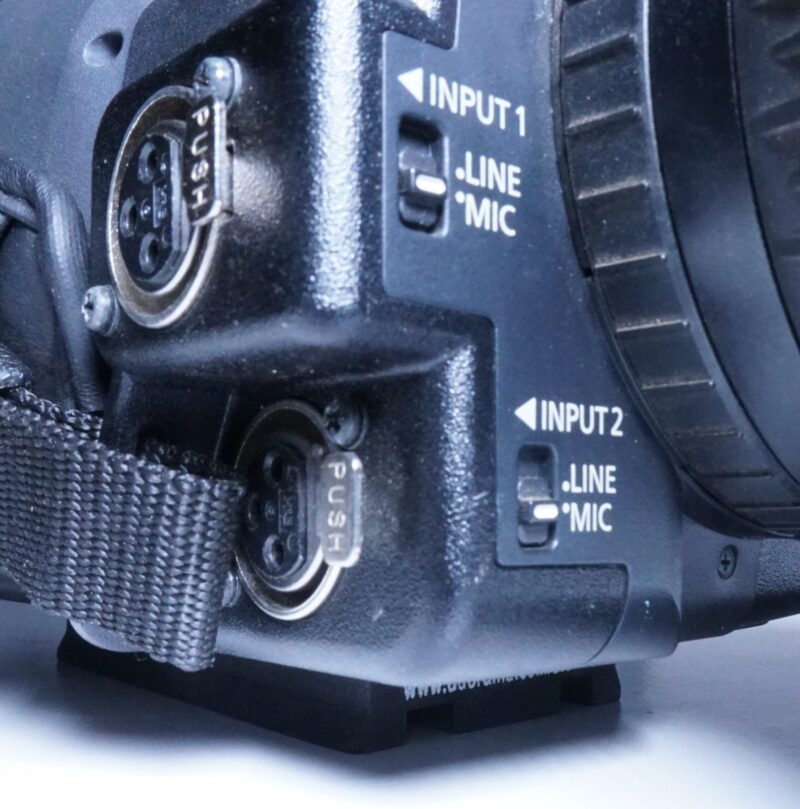
When connecting audio gear to a camcorder, note that there are two input levels as shown in Figure 3, Line and Mic. Powered devices like soundboards typically output line-level outputs, which is approximately 1 volt in power. In contrast, microphones output just a few thousandths of a volt and requires amplification circuits in your camcorder to boost the signal to a useful level.
If you plug in a microphone and your input is set to Line, you likely won’t hear anything because the levels will be too low. If you plug in a soundboard when the input is set to Mic, the signal will be loud and distorted. As you see in Figure 3, professional camcorders let you switch inputs via a control on the camera body. Most DLSR and consumer camcorders input mic level only, so you can’t directly connect a line-level output to the 3.5mm plug. Instead, you’d have to use an adopter like the KOPUL ACH4-25MON Line-to-Mic Attenuator Cable or a mixer like the aforementioned Comica unit discussed below.
With this as background, let’s jump to task 1; connecting a lavaliere microphone directly to your camcorder.
Connecting a Lavaliere Microphone to a Camcorder
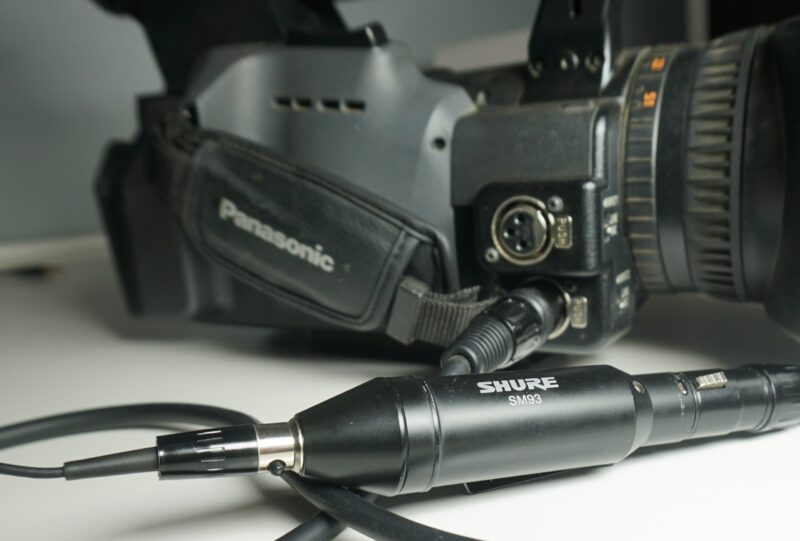
Figure 4 shows the SM93 condenser lavaliere microphone that I’m connecting to my Panasonic camcorder. Here are the discrete steps of connecting and setting up the microphone. Note that controls will vary from camcorder to camcorder, with some accomplished via the menu system rather than via controls on the camera body. But, you need to touch all the bases to ensure connection and control.
Step 1. Connect the microphone to the camcorder. I’m using input 2 for reasons that will become clear in a moment.
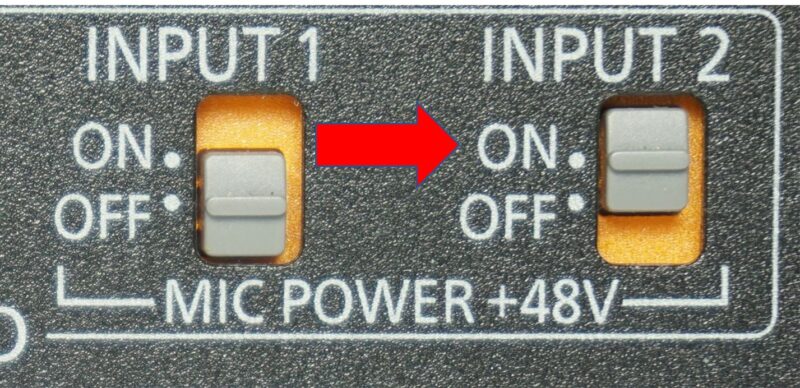
Step 2. Enable Phantom power by clicking Input 2 to On (Figure 5).
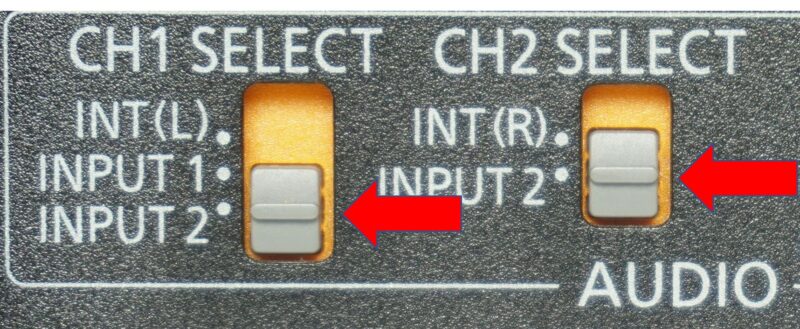
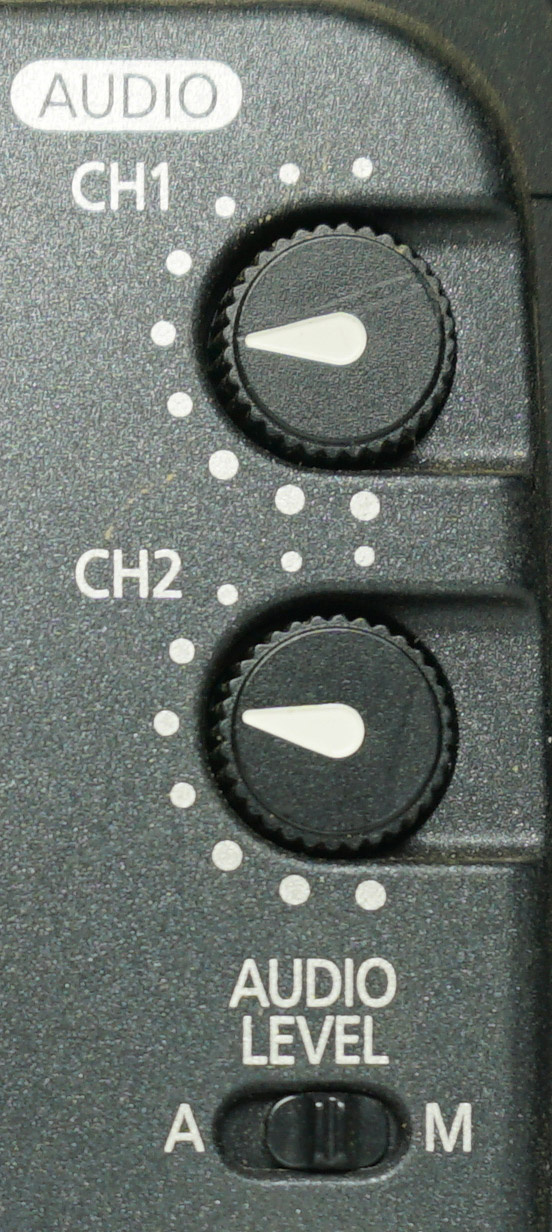
Step 3: Switch to the external microphone and assign inputs to left and right tracks. On this camcorder, you switch off the internal microphone via the controls shown in Figure 6. As mentioned above, the XLR input is a mono signal which I’m routing to both the left and right tracks. This is why I used input 2; it’s the only input that I can route to both tracks.
Step 4: Select Mic input for input 2 (see Figure 3).
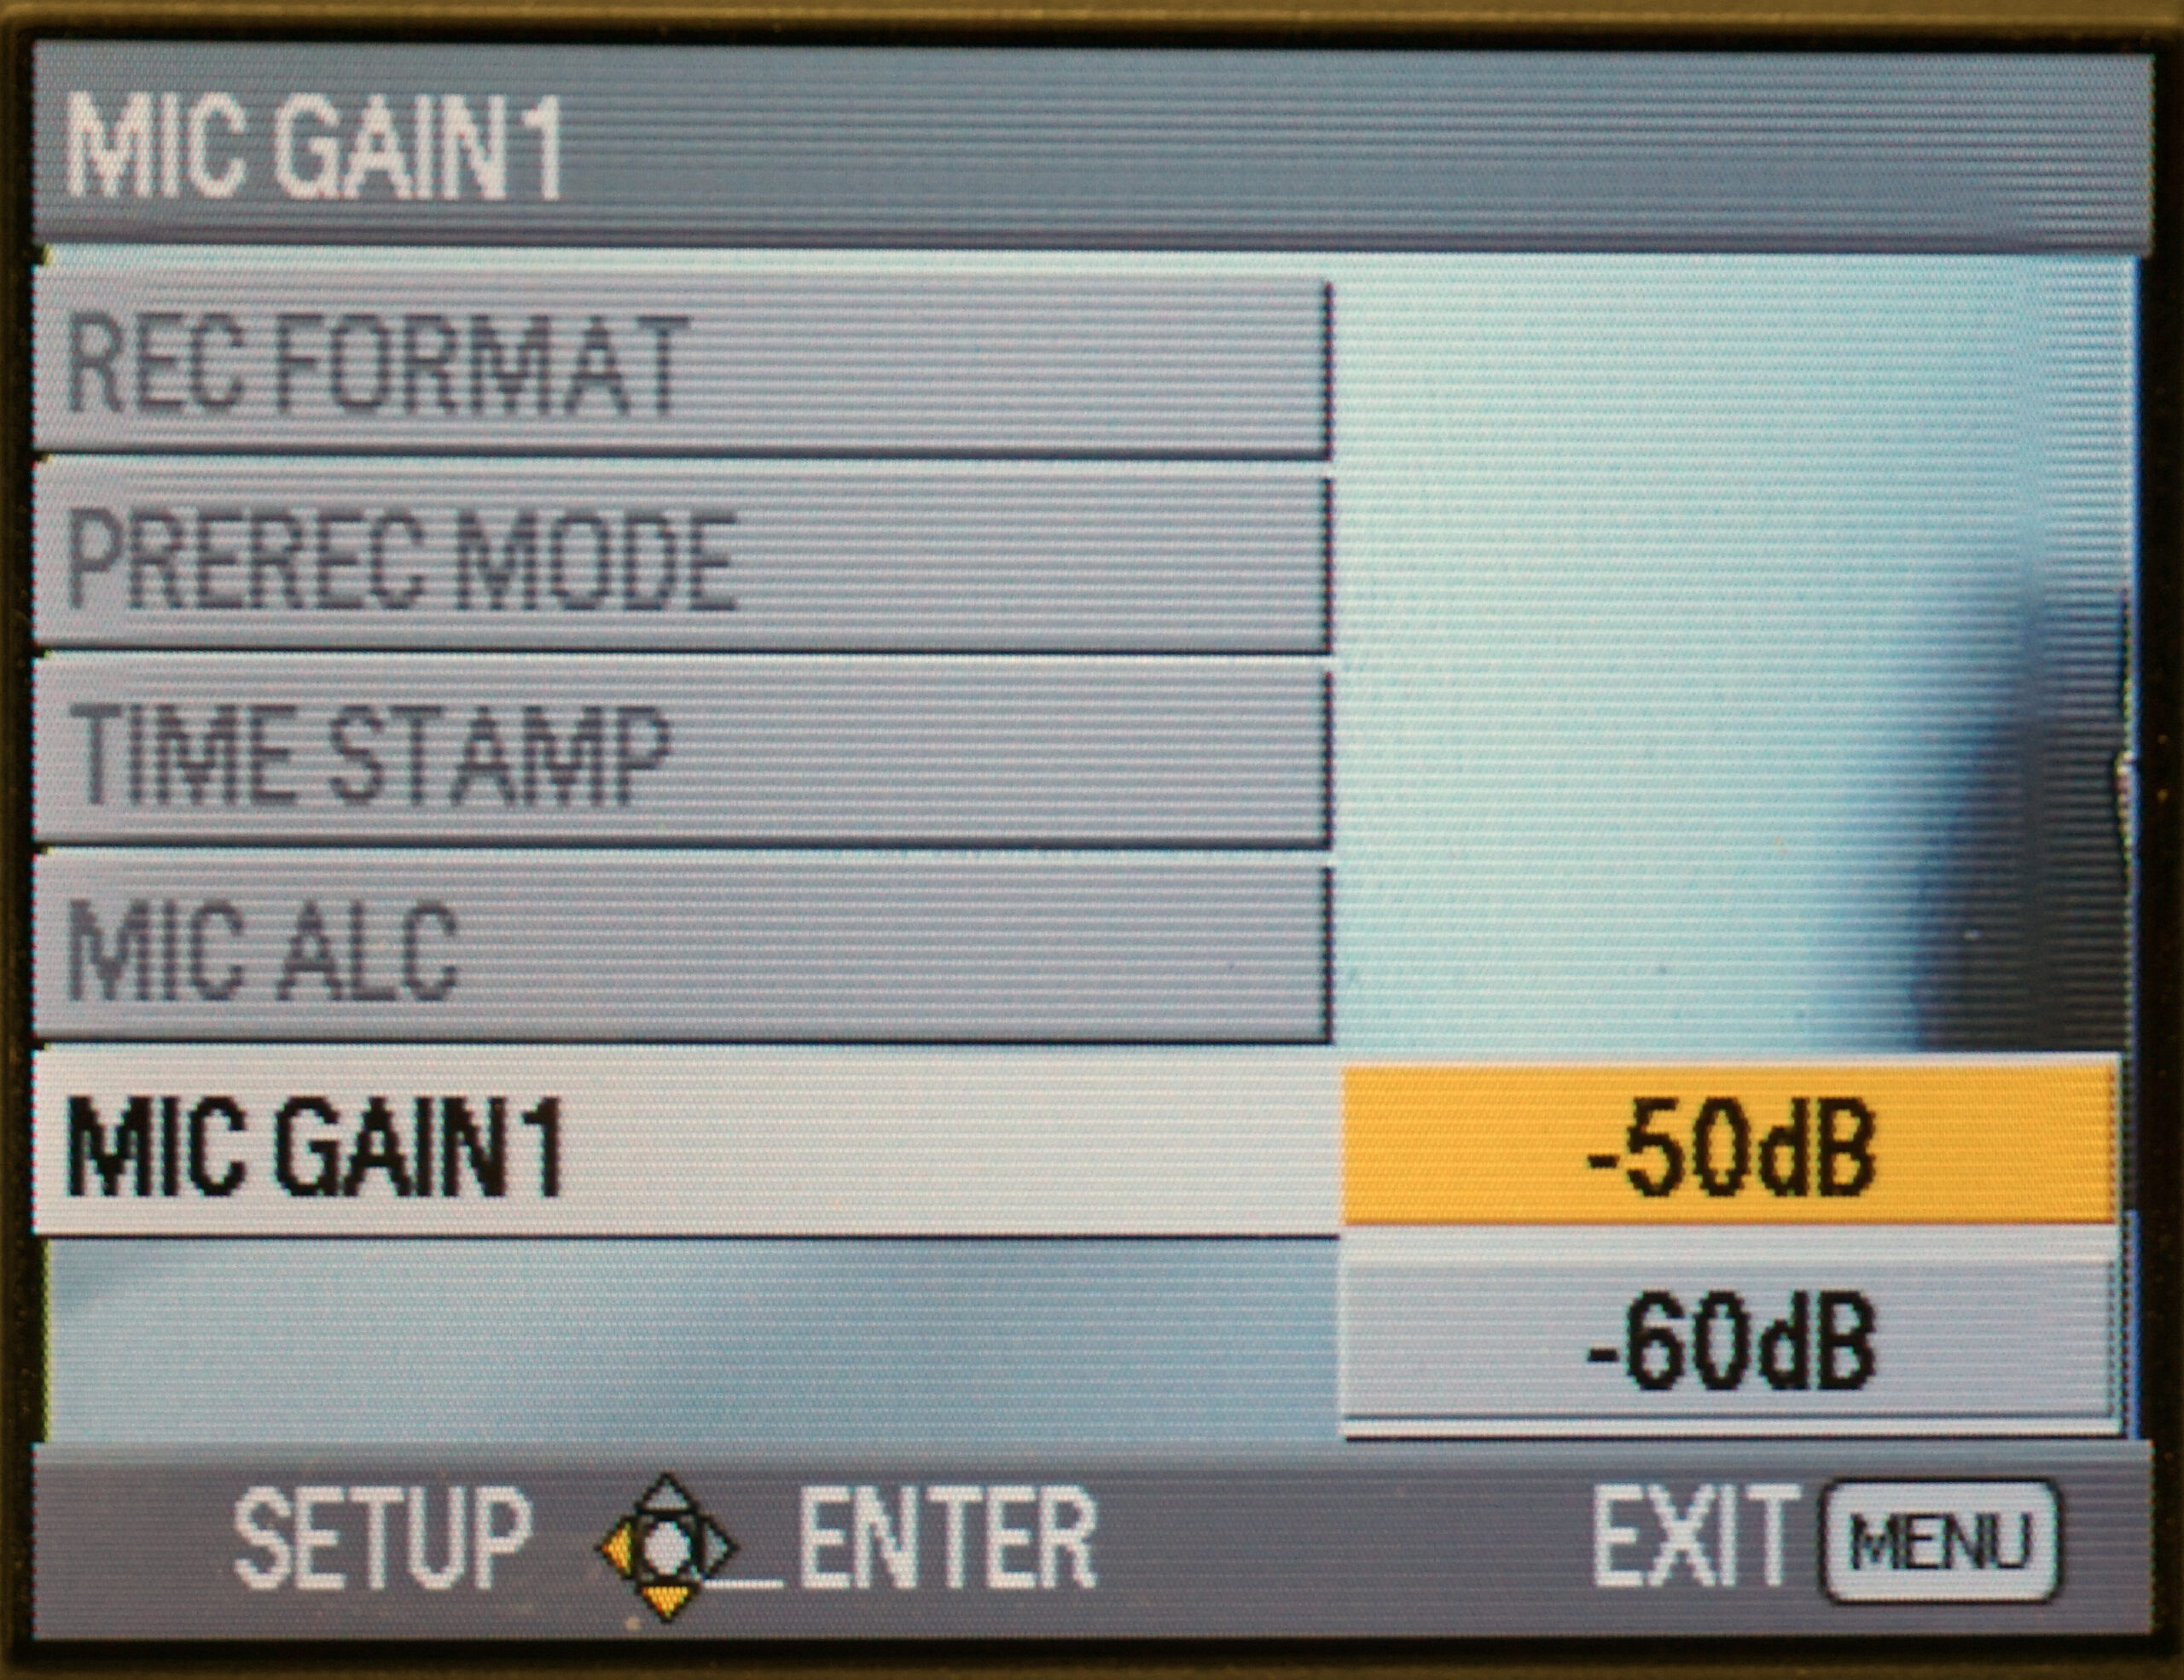
Step 5: Set Mic levels. The Panasonic camcorder allows you to adjust Mic levels to either -50dB or -60dB, the latter of which is more sensitive and will boost the mic signal by an additional 10dB, which may be essential if you can’t get adequate levels from the microphone (Figure 7).
Other camcorders I’ve shot with have an attenuator switch that lets you cut 20 dB from the incoming signal when it’s too hot. Also common is the ability to add gain to the incoming microphone signal, which boosts the volume but can create noise. The bottom line is that your camcorder probably has multiple audio-related controls that you should get familiar with long before your first money shoot or live event.
Step 6: Choose manual or auto gain control (AGC). On most camcorders, you can either manually control the volume or let the camcorder control it via AGC. Typically, in a talking head scenario where volumes don’t fluctuate all that much, you’re better off setting levels manually.
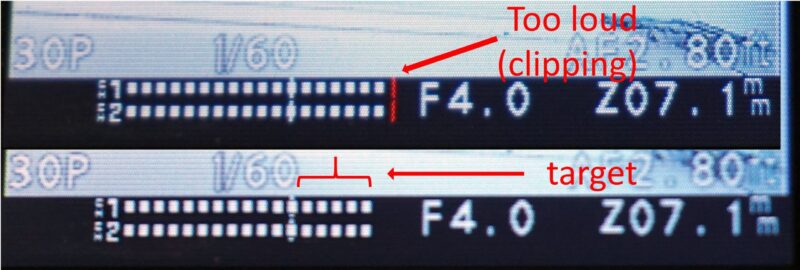
Step 7: Adjust volume to target. This step is complicated by the fact that different camcorders use different level markers. For example, the Panasonic volume meter shown twice in Figure 9; on top too loud, on the bottom just right, sets a -12 dB target where most of your spoken audio should peak. If you hit the red, as you see on top of the Figure, the audio will “clip” and sound distorted.
Also, check to make sure that the audio is relatively noise-free when no one is talking – if you see levels in the meter when everything is quiet you either have some noise in the audio or you’re shooting in a noisy room. This would be a good time to remind you to record in a quiet room whenever possible. This means shutting off all computers and peripherals, phones, heating and air conditioning if possible, as well as putting a sign on the door to keep visitors away.
Never work with audio unless you have headphones around to monitor the audio. Meters are fabulous but you never know exactly what you’re capturing unless you hear it with your own ears.
Connecting a Mic to a DSLR or Camera with 3.5mm Connector
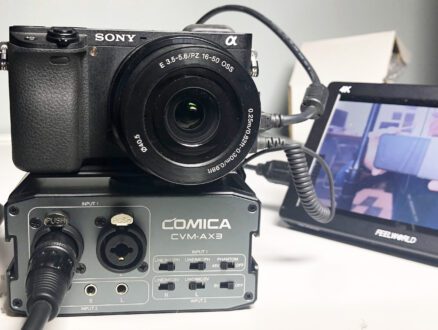
Though there are adapters that you can buy to convert XLR input to 3.5 mm output, these don’t supply Phantom power to the microphone. In addition, if you’re using a wireless audio system with battery-powered mics and a receiver, the receiver typically includes both 3.5 mm and XLR output to work with a range of cameras. So, you don’t need a unit like the Comica CVM-AX3 unit shown in Figure 10 to work with professional audio gear. On the other hand, if you need Phantom power you’ll need a device like the CVM-AX3.
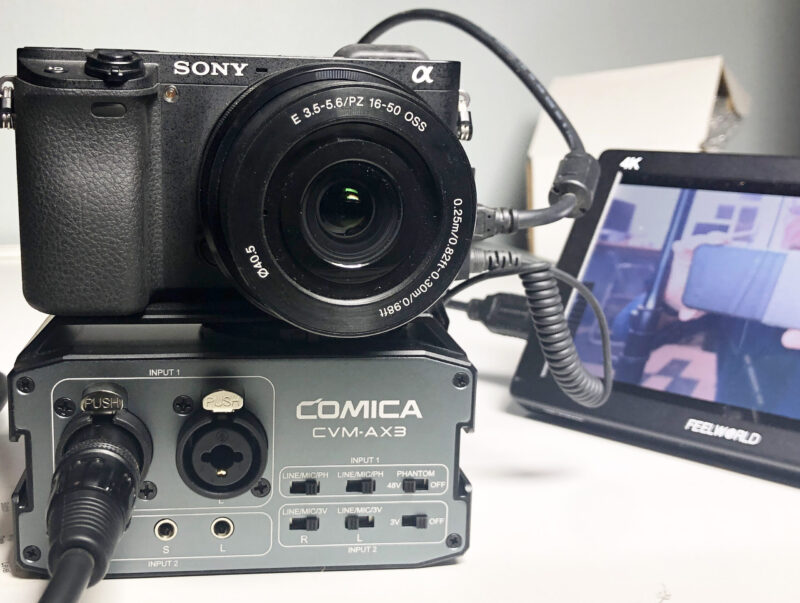
Looking at Figure 10, the CVM-AX3 supports both XLR (input 1) and 3.5 mm connectors (Input 2) and can supply both Phantom power and 3V plug-in power. Note the 4K monitor on the right, which is made absolutely essential by the lack of a headphone jack on the Sony a6300.
To get everything set up and connected, you turn on the adapter (Figure 11), plug in the microphone in Figure 10), enable Phantom power (Figure 10), and connect the adapter to the camcorder via the supplied cable on the left (Figure 11). Then you adjust the outbound levels of the adapter and the incoming levels on the camcorder to produce adequate audio, which should peak during a normal conversation at the -3 dB shown in the Figure.
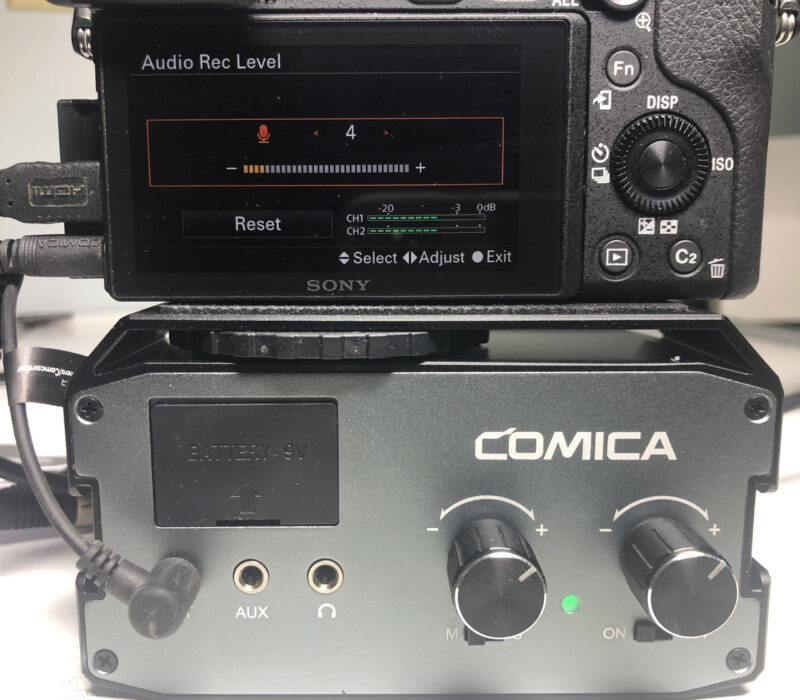
Technically, what we’re doing when setting levels is boosting the microphone input so that it’s clearly audible, which is an operation that a high-quality pre-amp can accomplish better than a poor-quality pre-amp. I’ve watched tutorials that advised that since the pre-amp on an inexpensive DSLR might produce lower quality than those in an audio device like the Comica, you should set levels as low as possible in the camcorder and boost the signal in the adapter. That’s why the Audio Rec Level in the a6300 is set to 4 in Figure 11, and the Comica’s volume controls are set close to the max.
I experimented both ways; low in the camcorder and high in the adapter, and vice versa, and didn’t notice any difference. Still, particularly if you’re pulling audio from a high-quality soundboard, it’s best to keep levels low in the camcorder and increase the volume in the external device.
Connecting to a Sound Board
If you’re shooting an event with audio routed through a soundboard, you’ll want to input that audio into your camcorder for live streaming or even recording if at all possible. After all this instruction, connecting to a soundboard should be straightforward, just make sure that your plugs are set to Line power and go through the steps. However, there are typically three things to consider when connecting to a soundboard.
- Location, location, location. Make sure that the soundboard is proximate to where you want to set up your camera. If not, you’ll want to run a cable from the soundboard to your camera. This is best done early so you can tape the cable down, and via a balanced cable, which typically means XLR or quarter-inch TRS cables. I don’t have time to go into balanced vs. unbalanced here, but if you have a long cable run from the soundboard to your camcorder, you better study up on this.
- Make sure there’s a spare output for you. Soundboards have multiple outputs, but many go to speakers, recorders, and other devices. So make sure there’s a spare output for you, preferably two outputs for a stereo signal.
- You’ll probably need to buy a cable or adapter(s). Once you know what output is available, you have to figure out how to connect it to your camcorder. As an example, 1/4” plugs are popular with soundboards, so you’ll probably need a 1/4” to XLR adapter, and perhaps a 1/4” stereo adapter to separate XLR signals.
All this means that you should contact the soundboard operator as soon as possible before an event to iron out these issues. You should also try to connect to the soundboard before the event while you still have time to swap out cables, plugs, or adapters if necessary.