Streaming Learning Center Where Streaming Professionals Learn to Excel

Related Articles

Remote production has garnered significant notice over the last few years for obvious reasons. While there is a specific definition that I’ll share below, the concept has expanded to any production schema where the talent or event is at one location and the video production at another.
In a recent webinar produced by the Streaming Learning Center, three experts presented three different schemas for producing events remotely, including details like equipment required, technical complexity, and expected quality. This article outlines these three schemas to provide a high-level view of these three alternatives. If you’re wondering what REMI production is and how to make it work for you, you’ll find the article (and perhaps even the webinar) worthwhile. I’ve also included links to their individual presentations below.
Contents
True REMI Production
According to LiveU, “Remote production, or REMI (for Remote Integration Model), refers to productions that send camera operators and minimal production crew to remote events to feed live camera signals to a central studio for production rather than an on-site production truck.” This is the schema shown in Figure 1, and it’s the production technique discussed by Corey Behnke, Producer and Co-Founder at Live X, where, he has produced the worldwide webcast for New Year’s Eve in Times Square for the last ten years, among many other events. You can download Corey’s presentation here.
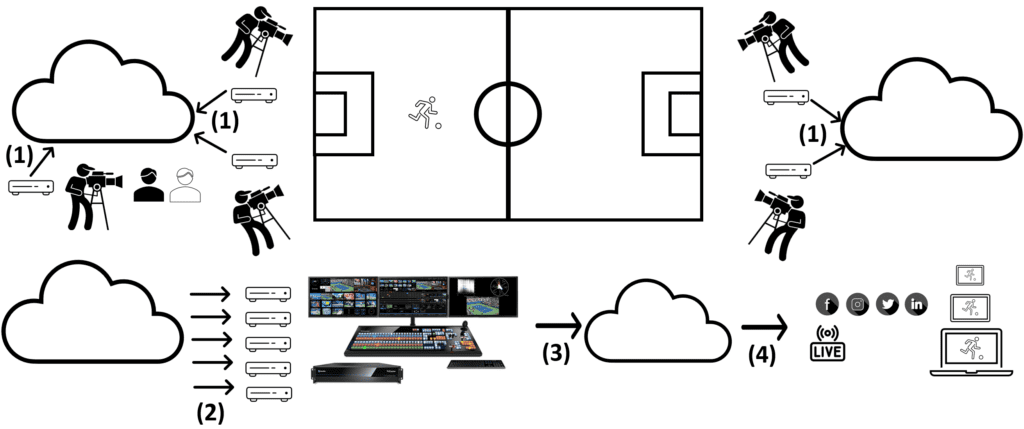
Figure 1 shows REMI production of a football match. You see four camera operators shooting the field and one shooting the announcers, though the announcers could actually sit at the remote production facility, or anywhere else for that matter, so long as they can watch the camera feeds. The drawing is imperfect, of course, there is just one cloud rather than four separate ones, but hopefully, you can get the picture.
Each camera has an encoder that sends a stream into the cloud that ultimately connects to a decoder in a production facility. That decoder produces an input feed into the video mixer used for production — in this case, a NewTek TriCaster— and the video production is mixed just as if the action was local, which means all the bells and whistles that your viewers are used to. From there, the video is sent back out through the cloud for delivery to the network, live streaming service provider, and/or social media.
The figure shows the Tricaster encoding and sending the program feed into the cloud for distribution. Note that many producers output an HD-SDI or HDMI signal into a separate standalone compressor to minimize the load on the Tricaster.
Like all the options discussed here, you don’t have to send your production crew to the event itself, which is expensive and time-consuming. In fact, using this schema, the same production team could produce multiple events in a single day.
One unique advantage of this schema over the two others is video quality, which can be broadcast quality assuming you have the equipment and connections to support it. The key negative is cost; Figure 2 shows Corey’s equipment list which is extensive and expensive.
Another consideration is technical complexity. Assuming that you’re using a video mixer like a Tricaster you’ll need a skilled operator just for that plus technicians to assemble and configure the necessary signal flows and communications. This is not a DIY schema for newbie producers just getting started.

If you find these costs a bit jarring; no worries, the other two alternatives are much less expensive and much more accessible. In general, true REMI production is a cost-saving technique for broadcast producers, not an option for a small business that wants to broadcast a corporate event, sales meeting, or executive interview.
easylive.io – Mixing in the Cloud
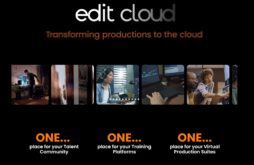
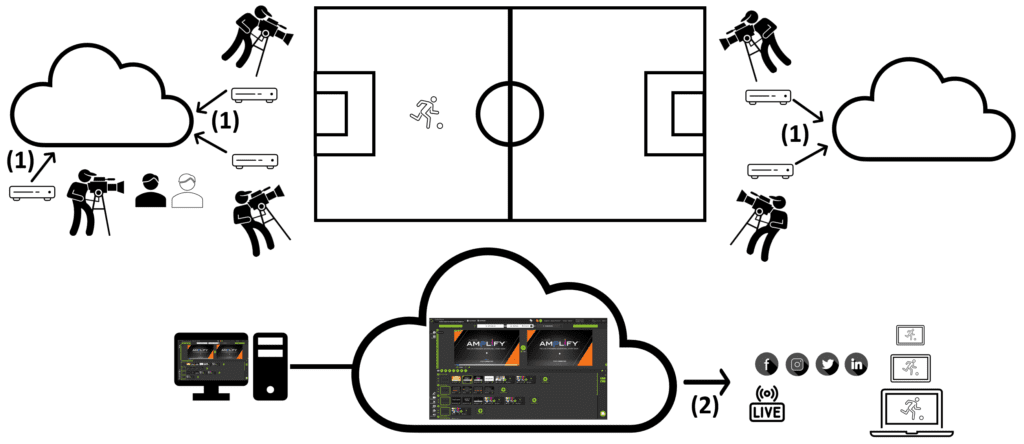
The next schema was mixing in the cloud as explained by John Porterfield, live stream specialist at Social180Group. Specifically, John detailed cloud-based productions using a service called easylive.io, which is illustrated in Figure 3. You can download John’s presentation here.
With easylive.io (and other cloud editing services) you send the camera feeds into the cloud using SRT or other services like RTMP or live-to-air transmission devices such as LiveU, AviWest, or Haivision Makito’s. You mix and produce in the cloud via the internet browser on a connected computer. The on-site equipment shown in Figure 3 is the same as Figure 1, but you can adjust this for your quality expectations, using less expensive gear or even a webcam.
Because you’re editing in the cloud, you don’t need the local decoders or the Tricaster, so your CAPEX costs go way down. You also don’t need a high-speed outbound connection to support the Tricaster output; once the video is mixed it’s streamed directly from easylive.io.
There is a significant drop in production flexibility as compared to Tricasters and other broadcast mixers, so you do lose some features, but the output can be quite professional. As shown in Figure 4, you can deploy logos, social media icons, and support up to eight live sources at up to 1080p/60.
The system can input audio and video of remote guests via WebRTC, record clips for instant replay or segments, insert advertisements, enable multiple language support for the same event via different announcers speaking different languages, and publish to up to 30 different destinations simultaneously. For those just getting started, easylive.io is much easier to learn and use than the Tricaster and similar professional systems.
Because easylive.io publishes the output streams for you, you don’t need a separate encoder for each output destination and you don’t have to encode in your mixer which can degrade overall performance. Ditto for event recordings that are stored in the cloud, obviating the need for the video mixer to encode and store one or more streams locally.
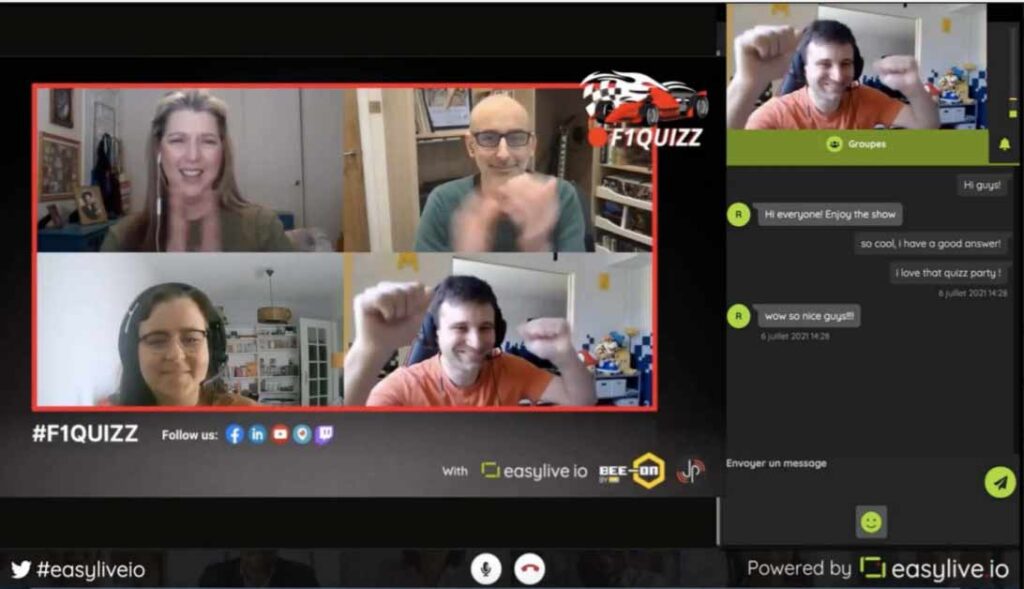
Let’s address the elephant in the room. That is, for a production like that shown in Figure 4, why use easylive.io rather than Zoom or similar conferencing systems? Several reasons. First, you get much more production flexibility in branding and design than with Zoom. Second, assuming that you have the right equipment and available bandwidth, easylive.io productions should have much better quality than the highly compressed audio and videos produced by most conferencing systems. Third, you have more options to send the stream to different live streaming destinations and social media sites.
This leads us to our last alternative, remote production on a local computer or notebook via a program like vMix or Telestream Wirecast.
Remote Production via vMix
The last schema was presented by Anthony Burokas, Head of Streaming for Dallas-based DHD Films and long-time Contributing Editor for Streaming Media Producer on live production. He described how to do professional productions from your home studio/office with multiple off-site subjects using vMix Call. You can download Anthony’s production here.
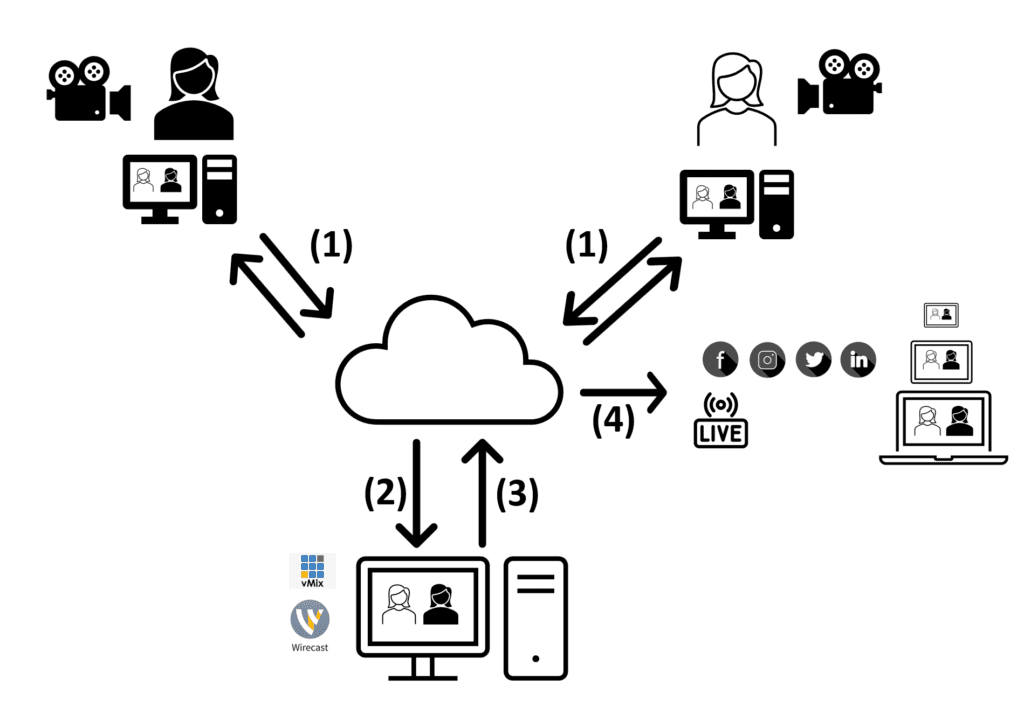
vMix Call and Telestream Wirecast Rendezvous are interview features of the two software-based video mixing programs that you run locally on a computer. With both products, you send an email invite link to each guest who connects via their web browser. The browser encodes the input and sends a feed through the cloud back to the host computer, which sends a return feedback to the speaker so they can see the host and other guests. The local production computer mixes the program, encodes the output, and sends that back to the cloud for distribution.
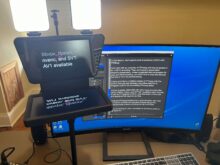
If you’re not familiar with Wirecast and vMix they are very sophisticated programs that can color correct and white balance your incoming video, filter and sweeten your audio, and create custom layouts like that shown in Figure 6. Other similar tools include, but are not limited to, OBS, and Vimeo’s Livestream Studio software.
In vMix, you can customize the audio and video return back to the remote viewer and include presenter notes, chat comments, and timers. You can even create a separate audio backchannel back to each speaker so that a producer can talk to them without interfering with the program audio feed. Obviously, this is a lot more control over the production and output than you get with Zoom or similar systems.
These systems can output to any live streaming or social media platform that accepts an RTMP or SRT stream, with vMix capable of streaming to three outputs if you have a powerful enough computer and sufficient bandwidth. Also depending upon the hardware in your system, both systems can support outputs for local display, and record multiple input feeds and program streams.
This approach has multiple advantages. Most remote users can use existing webcams and (hopefully) external microphones and their internet connection, so long as it supports a 2 Mbps upload stream on their end. You can produce a simple two-person presentation on a competent notebook and scale your computer to meet your production needs.
Wirecast Studio costs $599 to support up to two guests, or you can pay $799 for Wirecast Pro and support up to seven remote guests. You also have multiple options with vMix, including one caller ($350 “HD” license), four callers ($700 “4K” License), or eight callers ($1,200 “Pro” License). These are one-time, “perpetual” purchases, not subscriptions. vMix also recently added a $50/month subscription to the Pro license.
On the downside, at least with vMix, your remote inputs are typically 720p- the limit of most remote caller’s computer webcam resolution. This should be sufficient for picture-in-picture deployments but might be soft for full-screen viewing. Unlike with easylive.io, you may also need substantial bandwidth at the production site to support all the separate incoming streams, as well as all of the separate return feeds to each caller, as well as all your output live streams. It can add up.
REMI Production Summary
The table below summarizes our findings. If you’re looking for broadcast-quality video, true REMI is probably your only option though the folks at easylive.io and other cloud-mixing services might disagree. In all cases, if you’re working with HD webcams or better and a decent audio setup, audio/video quality should be better than Zoom; perhaps much better.
Production features describe what the audience sees besides the video, including picture-in-picture, graphics, instant-replay, and the like. Obviously, this will relate to the software mixer that you’re using but the table assumes the best in class for each category. Again, you’ll have much more flexibility and a higher quality look than Zoom and similar providers.
True REMI is clearly the most expensive of the three while mixing in the cloud obviates the need to have a powerful local workstation which can cost a few thousand dollars or higher. This savings is partially offset by the monthly subscriptions cost of the cloud mixing service.
| True REMI | Mixing in the Cloud | vMix/Wirecast | |
| Video quality | Can be broadcast | Can be high | 720p video |
| Production features | Professional | Very competent | Very competent to professional |
| Hardware and software cost exclusive of AV Gear | Typically, the most expensive CAPEX for mixer and encoders/ decoders. | Least CAPEX, some OPEX | Some CAPEX very little OPEX (unless you opt for vMix subscription model. |
| Technical complexity | Depends upon mixer; but high for Tricaster and similar | Easy to moderate | Easy to moderate |
From a usability standpoint, Wirecast and vMix are much easier to learn than a truly professional mixer like Tricaster (which Anthony disagrees with, so this is not Anthony’s conclusion) and about the same as easylive.io. Between the two, I find Wirecast slightly easier to use with vMix offering a bit deeper feature set, particularly for these types of productions.