 Streaming Learning Center Where Streaming Professionals Learn to Excel

Related Articles


Streaming producers need tools to explore different encoding options and verify their work. Here are two free Windows tools that I couldn’t live without.
MediaInfo
MediaInfo is a video analysis tool that displays the most significant data points regarding a video file, including resolution, data rate, codec, bit depth, frame rate, duration, etc. It’s available for download here, and there are versions for Windows, Mac, iOS, Android, Debian, Ubuntu, Linux Mint, and many other operating systems.

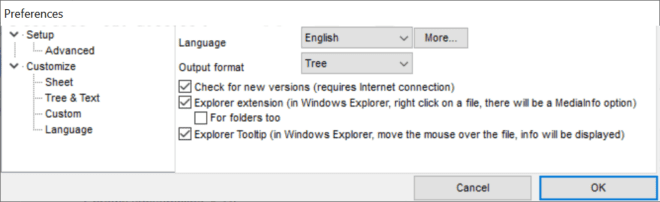
Once you install MediaInfo on Windows, you should explore the preferences that you access from the Options menu (Figure 1). Here you choose your default view out of the about 15 different views for the data. I prefer the Tree view shown in Figure 3 and use the HTML view shown in Figure 4 frequently to view encoding details—more on that below.
The three checked boxes on the right are checked by default. Most relevant is to enable the Explorer extension, which allows you to right-click a media file and open the file within MediaInfo. You can open multiple instances of MediaInfo, and once an instance is open, you can change files by dragging a different file onto the interface.
Back in the preferences window, it’s also nice to be able to hover your pointer over a media file in Explorer and load the Explorer Tooltip, which identifies the container format, data rate, resolution, frame rate, codec, and codec-related information like profile (Figure 2).
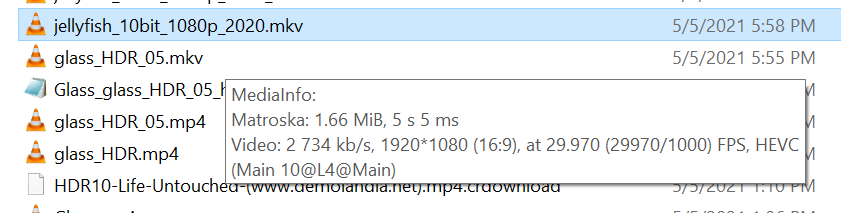
Figure 3 shows the data presented by MediaInfo. There are three major sections, General, which shows container format, duration, file size, overall bitrate, and other data; Video, which details video characteristics, and Audio, which does the same for audio. Most of the information is self-explanatory, like Format (codec), profile, duration, bit rate, width, height, frame rate, and bit depth.
I’ve just started working with HDR files where information like color primaries and mastering display color primaries are absolutely essential to understanding critical parameters of the file you’re about to encode and the files that you’ve produced.
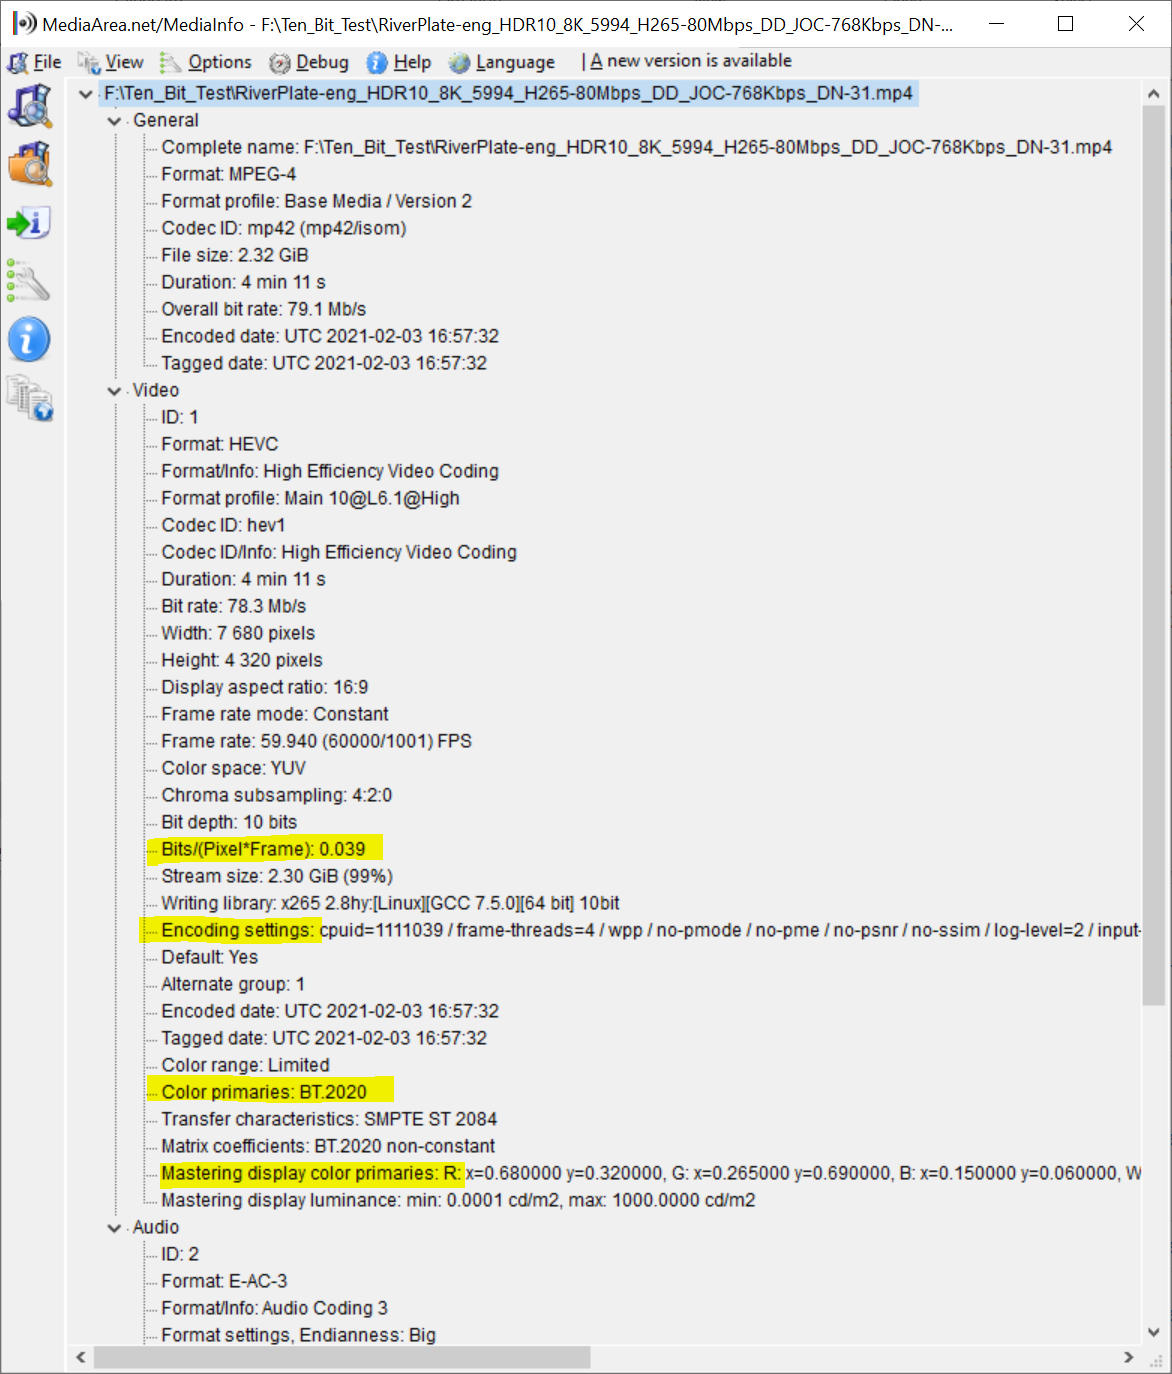
Bits/pixel is another critical data point, which as the title suggests, shows the amount of data allocated to each pixel in the video. Figure 3 shows an 8K file which is why the bits/pixel value is a relatively low 0.039. As a very general rule of thumb, a bits/pixel value of around 0.1 is sufficient to produce good quality in a 1080p H.264-encoded video.
So, if you’re watching a 1080p H.264-encoded video that looks terrible, and the bits/pixel value is 0.05, the problem is very likely that the data rate was too low. If you watch a very high-quality 1080p video and the bits/pixel value is 0.400, it’s a good guess that the data rate is much higher than necessary.
If you’ve to compare two videos with different resolutions and bitrates, the bits/pixel value gives you a common data point to compare how much compression was applied to the file. Most codecs get more efficient at higher resolutions, and, of course, HEVC is more efficient than H.264, which is why a bits-per-pixel value of 0.039 for an 8K HEVC encoded video is more than adequate.
The other highlighted description in Figure 3 is Encoding Settings, and here MediaInfo, particularly in HTML view, becomes a gold mine, especially when viewing most files encoded with FFmpeg.
You see this in Figure 4, which you access by clicking View > HTML. In this view, you see all the encoding settings either applied in your command string or via default values in a neat little grouping, which you can search by clicking Ctrl-F. This gets particularly useful with HEVC, which has dozens of parameters that appear in the Encoding settings listings.
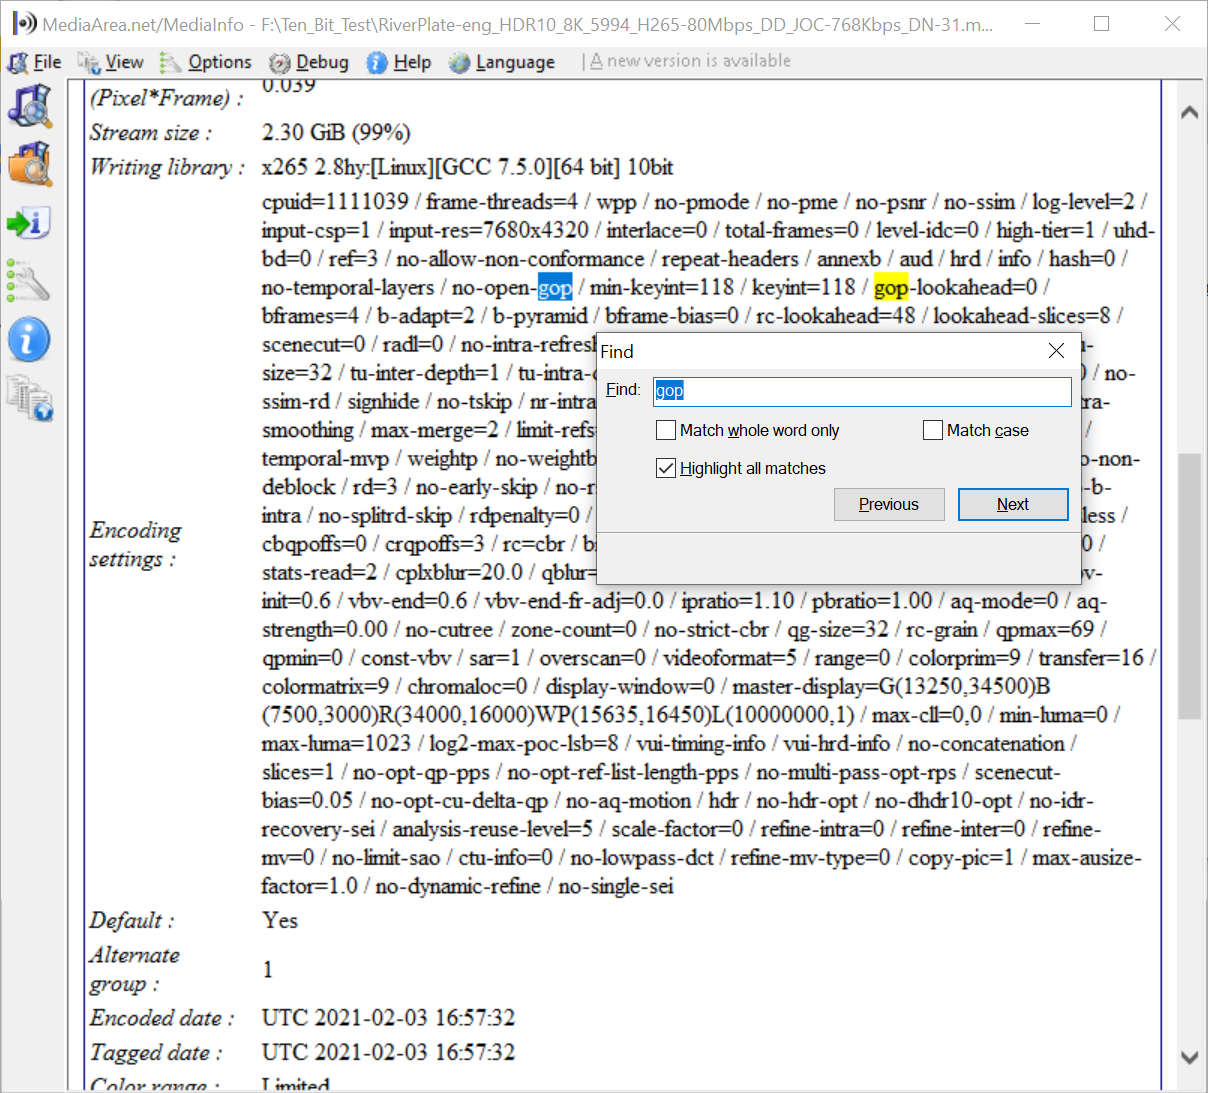
When you’re experimenting with new FFmpeg settings, you should check your output in this view after each encode. FFmpeg doesn’t always report command string errors, and unless you verify that the settings worked as advertised, you may later find that they don’t.
The HTML view is also wonderful for understanding how other producers are encoding their files. When researching the impact of the VBV buffer here, I downloaded files from Apple, CNN, and other services to learn what VBV values they used in their videos, which verified many of my assumptions and recommendations.
However, not all codecs and encoders provide this information. For example, if you encode using the AV1 codec in FFmpeg, encoding settings don’t appear. Ditto for encodes with many other encoders.
Note that you can’t use drag and drop file loading when in HTML view; MediaInfo will attempt to load and play the file. So, click back to Tree or other view and MediaInfo should load the file and display the file-related data normally.
BitRate Viewer
The other software program, BitRate Viewer, is only available for Windows and can’t input any codecs newer than H.264, so HEVC, VP9, and AV1 are all out. If you can live with these limitations, you’ll find the program useful in several scenarios. For example, as shown in Figure 5, bitrate control techniques significantly impact the moving-average data rate of the file (wavy blue line) and the peaks and valleys in the data rate.
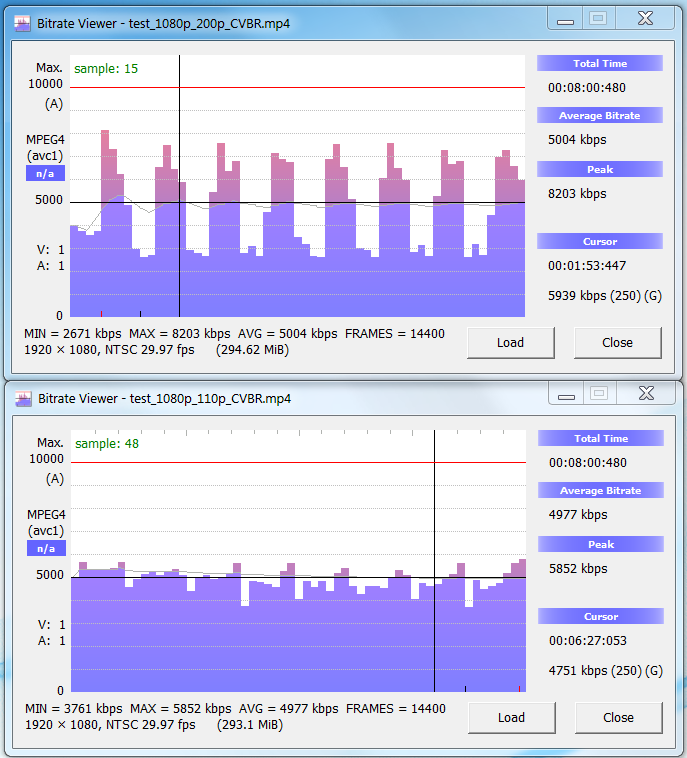
Figure 5. Bitrate Viewer is great for viewing the bitrate distribution of a file but is Windows-only, and can’t analyze HEVC files.
On top is a 1080p test file encoded at 5 Mbps using 200% constrained VBR, and you see the data rate peaking at 8203. On the bottom, the file is encoded at 5 Mbps using 110% constrained VBR encoding, and the peak rate is 5852, much more palatable for those streaming over 4G or even 5G. If viewers on constrained connections experienced buffering issues in the first file, one glimpse at BitRate Viewer would explain why.
As my consulting and teaching practice has extended beyond H.264 and Windows, I use Bitrate Viewer less and less. Still, virtually all streaming producers are delivering H.264-encoded video; if you’re still experimenting with your encoding parameters and have a Windows workstation around, Bitrate Viewer will probably come in handy.


