Note: This update details how to compute VMAF with FFmpeg on Windows. From my perspective, this feature has gotten progressively less usable and increasingly frustrating. Documentation is poor and the syntax is idiosyncratic and hard to use. If you have any alternative, like Moscow State University’s Video Quality Measurement Tool, I would spend the money and get something that works robustly.
To compute VMAF with FFmpeg you’ve always had to download “model” files from the Netflix GitHub site. These models have historically been .pkl files but recently they changed to .json files.
Note that you’ll need a reasonably current version of FFmpeg to make this work and that almost all downloadable FFmpeg versions now come with VMAF compiled therein. I’m working with this build downloaded on March 27 from Gyan.dev.
Contents
Once FFmpeg is Installed and In Your Windows Path
Now you have to download the VMAF model that you want to use. Currently, there are three:
- The default model – maf_v0.6.1.json which is “trained to predict the quality of videos displayed on a 1080p HDTV in a living-room-like environment.”
- The 4K model – vmaf_4k_v0.6.1.json, “which predicts the subjective quality of video displayed on a 4KTV and viewed from the distance of 1.5 times the height of the display device (1.5H).”
- The anti-hacking model – vmaf_v0.6.1neg.json, where “neg” stands for “no enhancement gain.” This reverses out techniques like “sharpening, contrasting, histogram equalization, among others, could boost VMAF scores. While such operations could enhance the image quality as perceived by the end viewers if applied properly, it is evident that VMAF tends to overpredict the perceptual quality even when such operations are overused.”
Note that the VMAF phone model isn’t a separate model but a mode you can run with any of the models shown above. xYou’ll learn how below.
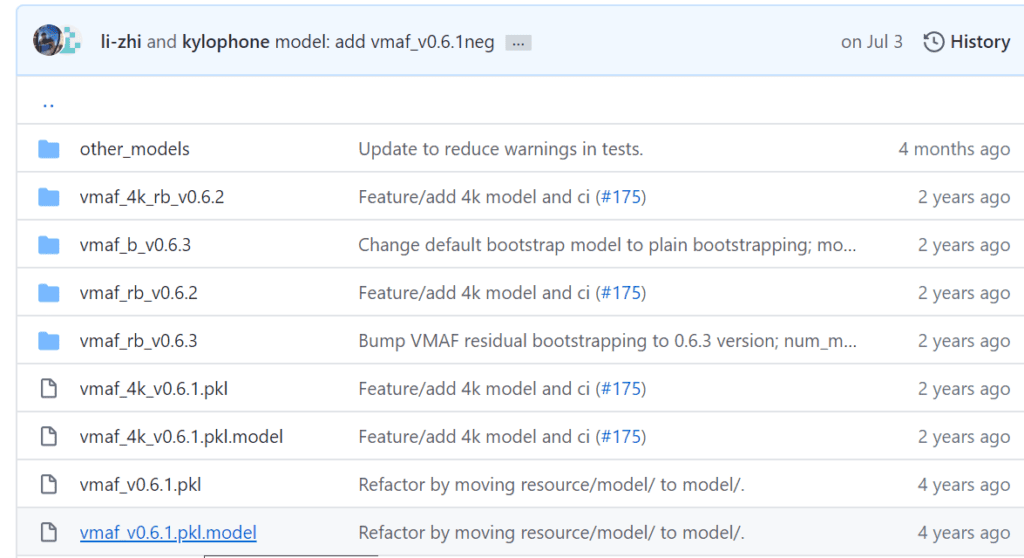
Here’s how you download the models and the associated .pkl files.
1. Go to the Netflix GitHub model page here.
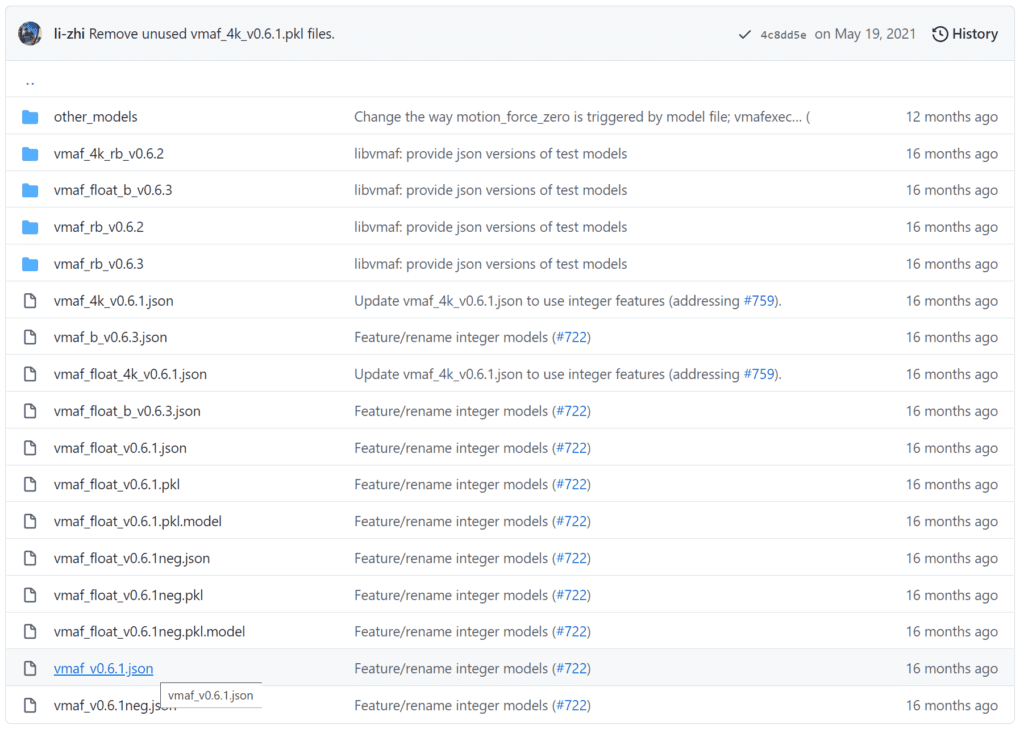
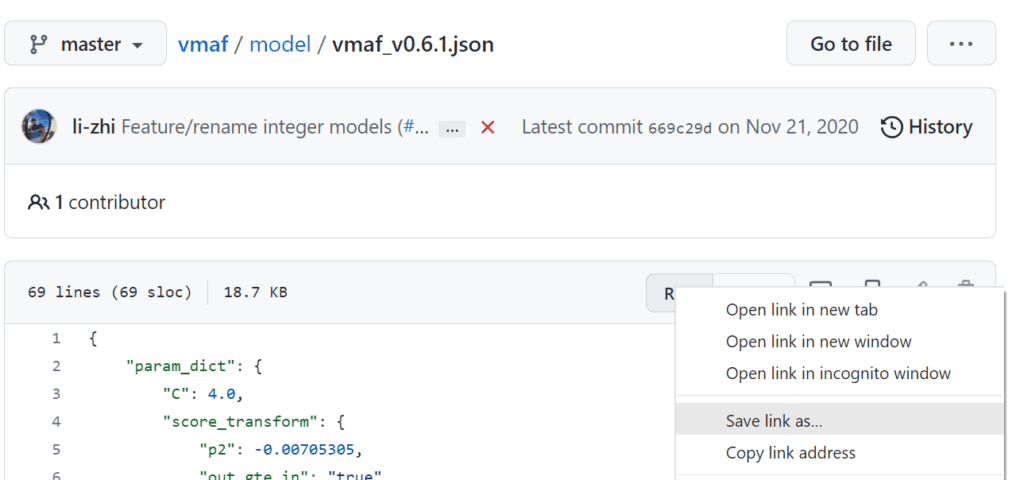
2. Click the desired model to download. In this case, I’m choosing the .json file for the default model. This takes you to another GitHub page for that model. On the top right (partially hidden), right-click the Raw button and choose Save link as.
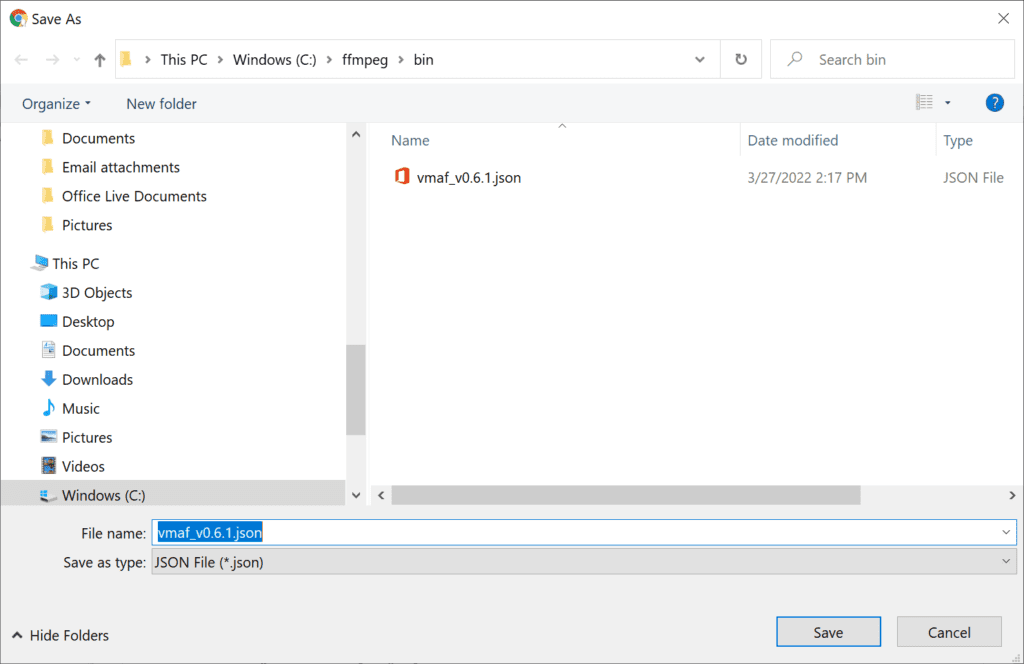
3. This bit is important. Save the file in the same bin as ffmpeg.exe. If you don’t do this, the command strings shown below won’t work. For me, this is always c:\ffmpeg\bin as shown in the figure below. Note that you can save these models anywhere you’d like, but you’ll have to adjust the command strings below for that custom location.
4. Once you get the .json file, follow the same procedure for the .model file. Again, if you don’t get this file, and save it in the c:\ffmpeg\bin folder, the command strings shown below won’t work.
5. Download the .pkl file and .model file for each model that you want to run.
OK, now let’s move onto the command strings.
Command Strings: Compute VMAF with FFmpeg on Windows
Here’s a very simple command string:
ffmpeg.exe -i output.mp4 -i input.mp4 -lavfi libvmaf="model_path='C\:/ffmpeg/bin/vmaf_v0.6.1.json':log_fmt=xml:log_path=VMAF.txt" -f null -
This proves that the command is working, albeit with the model path error that I spent two hours trying to figure out without being able to resolve.
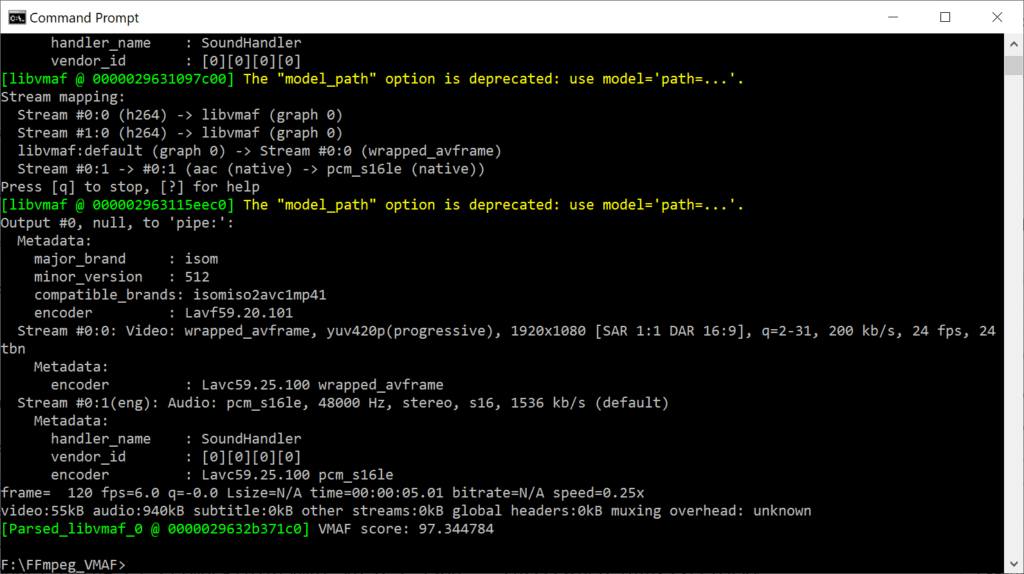
Here’s an explanation of the commands.
ffmpeg.exe – call the program
-i output.mp4 -i input.mp4 – list encoded file first, then source
lavfi– call librafilter
libvmaf – Identify the filter
"model_path='C\:/ffmpeg/bin/vmaf_v0.6.1.json' – This is where things get tricky. Why you have to use the reverse backslash is beyond my grasp of how Windows’ command language works, but you can read more about it here.
:log_path=VMAF.txt – path and name of the file to contain scores
-f null - – Tells FFmpeg to output a null file
Note the single and double quotation marks, which must be properly placed or the command string won’t work. So:
- First double quote before
model_path - The first single quote before the path to the model
- The close single quote at the end of the path and model name
- The close double quote at the end of the libvmaf filter commands, in this case, the
log path.
As I mentioned at the top, this command string is very idiosyncratic and error messages beyond cryptic. I know the command string shown works if you stored the downloaded files in c:\ffmpeg\bin on Windows; if you step out of those parameters, you’re on your own.
Other Options
You can find all the libvmaf options here. I hate to leave you hanging but I was unable to make any of them work reliably, and most of the changes are irritating, non-sensical, and poorly documented. Consider that before the “update” you called the phone model with this straightforward command:
phone_model=true
Now consider this in the new documentation. The bottom two make absolutely no sense to me; seemingly the same command to accomplish two different things.

The first is the error message reported above. I spent a bunch of time fiddling with the command string to comply with the new syntax and ultimately failed.
Going forward, I used this command to measure VMAF, PSNR, and SSIM.:
ffmpeg.exe -i output.mp4 -i input.mp4 -lavfi libvmaf="model_path='C\:/ffmpeg/bin/vmaf_v0.6.1.json':feature=name=psnr:feature=name=ssim:feature=name=psnr:log_fmt=xml:log_path=VMAF_all_metrics.txt" -f null -
Note that the above command lists PSNR twice. When I remove the second mention and try this command:
ffmpeg.exe -i output.mp4 -i input.mp4 -lavfi libvmaf="model_path='C\:/ffmpeg/bin/vmaf_v0.6.1.json':feature=name=psnr:feature=name=ssim:log_fmt=xml:log_path=VMAF_try1.txt" -f null -
I get this error message:

If I remove the SSIM computation and use this code:
ffmpeg.exe -i output.mp4 -i input.mp4 -lavfi libvmaf="model_path='C\:/ffmpeg/bin/vmaf_v0.6.1.json':feature=name=psnr:log_fmt=xml:log_path=VMAF_try1.txt" -f null -
It works. If I substitute SSIM or MS SSIM like below, it doesn’t.
ffmpeg.exe -i output.mp4 -i input.mp4 -lavfi libvmaf="model_path='C\:/ffmpeg/bin/vmaf_v0.6.1.json':feature=name=ssim:log_fmt=xml:log_path=VMAF_try1.txt" -f null -
I have no idea how to use the phone model, the path requirements are obscure and immensely confusing, and I can’t figure out what’s happening with the other metrics. Generally, there’s a bug in the code or I’m missing something blindingly obvious. Either way, I’ll leave it here, and if anyone wants to enlighten me as to any of these outputs, please contact me at janozer@gmail.com.
 Streaming Learning Center Where Streaming Professionals Learn to Excel





Hey Jan,
Lot’s of folks using Macs for this type of stuff, including me. Especially true now that Apple has been releasing more powerful Macs over the last few years.
Maybe some year when you are doing well you can get a pre-owned Mac?
Hope you are well and good,
Robert
Robert A. Ober
IT Consultant, Vidcaster, & Freelance Preditor(Producer/Editor)
http://www.infohou.com
Houston, TX
Rob:
I’ve got a pre-owned Mac, but no one cares about how FFmpeg works on a used MacBook Pro.
Probably expand into Linux/Ubuntu via cloud machines rather than Mac, unless Apple drops one in my lap (which last happened in 2009 so I’m not holding my breath).
Thanks for writing in and take care.
Jan
I’m not so sure. Depends on how old it is. Without testing on Mac you are losing a lot of potential viewers.
Robert
OK, I’ll try a Mac post and see how it does.
Jan
https://streaminglearningcenter.com/blogs/batch-scripting-with-wildcards-for-ffmpeg-on-ubuntu-and-mac.html
thanks for the explainer
ffmpeg has removed support for pkl files so anyone doing this later will need to download the json version of the filter and update the command string with json instead of pkl
Michael:
Thanks for the incentive to update this post – now done. Have a look and let me know your comments.
Thanks.
Jan