 Streaming Learning Center Where Streaming Professionals Learn to Excel

Related Articles


I frequently use the VMAF quality metric to analyze encoding parameters and compare codecs. In my experience, VMAF scores tend to match my own subjective quality observations and the fact that Netflix uses it gives the metric great credibility. Originally, there was only one VMAF version, but Netflix has added both a 4K model and a phone model, increasing the metrics’ utility.
For the most part, I compute VMAF scores with either the Moscow State University Video Quality Measurement Tool (VQMT) or the Hybrik cloud encoder which has a very robust analytical engine. However, to collaborate with a colleague who had neither of these tools, we used another tool which is available free from Netflix.
I call it VMAF-Master because that’s the name of the ZIP file you download from Github here, though the Windows executable that I used and downloaded from here was called vmafossexec.exe. It’s a command-line utility that’s fast and functional, though lacking some of the creature comforts of tools that you actually pay for. More on this below.
As the name suggests, you can compute VMAF, but also the PSNR, SSIM, and MS SSIM metrics. In this quick review, I’ll help you get the Windows executable installed, show you how to use all versions of the program, and then discuss its strengths and weaknesses.
Contents
Getting Up and Running
All users should download the code from Github here as shown in Figure 1 and then extract the contents to a folder on your computer. Most Windows users will want to do so on their C:\ drives; Linux and Mac users should pick the analogous drive on their systems.
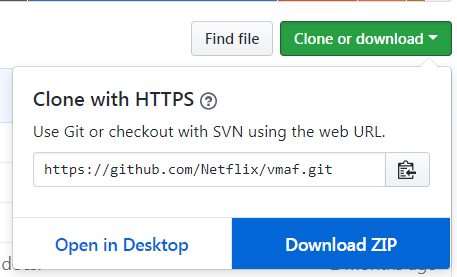
Figure 1. Download VMAF Master from Github.
VMAF-Master was originally written for Linux and the Mac with the Windows executable supplied by some open-source contributors. You’ll have to compile your own version for Linux and Mac; if you don’t know how I’m afraid it’s beyond my skill set. Figure it out and join us in the following section.
Click here to download the Windows executable (note: this executable is not the most current version. To get the most current version, you’ll have to download from Github and compile yourself).
The zip will extract the executable that you call into a folder entitled x64; it’s probably not essential that it’s located in the vmaf-master folder, but it will make it easy to find if you drag it in there. Here’s what the setup looks like on my C:\ drive.
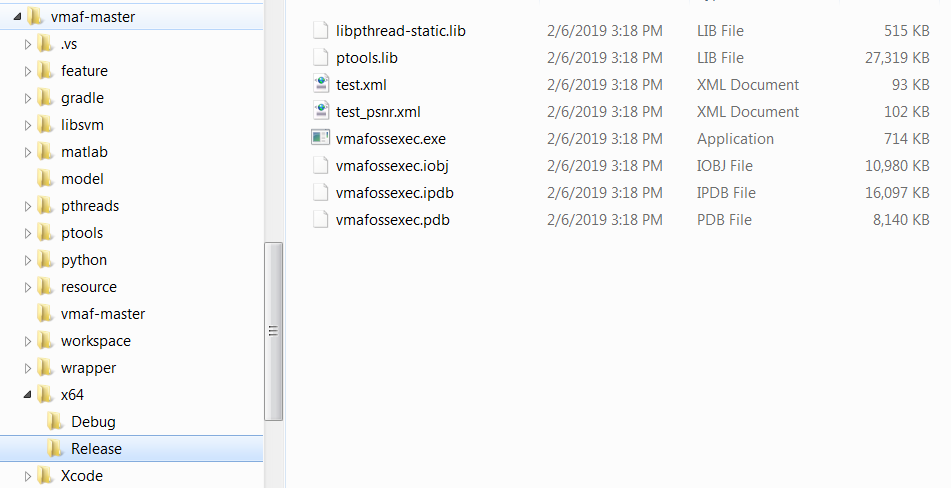
Figure 2. All the files in their places.
You can see the x64 folder on the bottom with the executable located in the Release subfolder. Note also the model folder which you’ll also refer to in the command string.
VMAF-Master Command Syntax
Like all well-mannered command-line tools, if you type -h after the executable name you’ll see the help files. I show this in Figure 3 which reveals the required command string.
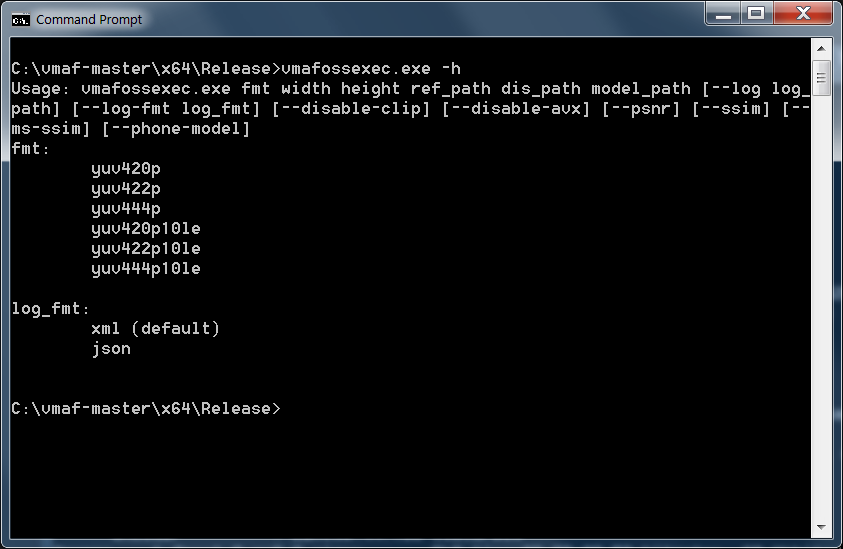
Figure 3. Running vmafossexec.exe.
Here’s what this looks like outside of the Command window. >
Usage: vmafossexec.exe fmt width height ref_path dis_path model_path [--log log_path] [--log-fmt log_fmt] [--disable-clip] [--disable-avx] [--psnr] [--ssim] [--ms-ssim] [--phone-model]
Here’s an explanation of the switches that I used.
vmafossexec.exe
– this calls the program.
fmt - this identifies the input format of the two video files; must be one of these -- yuv420p, yuv422p, yuv444p, yuv420p10le, yuv422p10le, yuv444p10le
width height – you got these.
ref_path - path to the reference file and reference file.
dis_path - path to the “distorted” or compressed video file and file name.
model_path - path to the model and model. As I write this, this must be either the default model (vmaf_v0.6.1.pkl) or the 4K model (vmaf_4k_v0.6.1.pkl). You add the phone model via the --phone-model switch shown below. Technically, the phone model is a custom version of the default model, so choose the default model to use the phone model.
--log log_path - log file name and path. If no path specified, the log file is stored in the folder with the distorted file.
--log-fmt - format for log file (must be either XML or JSON). If you don’t specify, the program stores out a CSV file in XML format.
--disable-clip - have asked Netflix; will add once they respond.
--disable-avx - have asked Netflix; will add once they respond.
--psnr - run the PSNR metric.
--ssim - run the SSIM metric.
--ms-ssim - run the SSIM metric.
--phone-model - run the phone model.
Prepping the Files
Note that vmafossexec.exe only works with YUV inputs so you’ll have to convert your reference and distorted files to YUV format. FFmpeg is the tool of choice and you can modify this command string for your conversion.
ffmpeg -y -i distorted.mp4 -pix_fmt yuv420p -vsync 0 distorted.yuv
ffmpeg -y -i reference.mp4 -pix_fmt yuv420p -vsync 0 reference.yuv
Obviously, you should substitute the actual extension for MP4 if necessary, and if FFmpeg doesn’t decode the file find a different decoder to do so. Note the pixel format used since you’ll input that into your VMAF-Master command string.
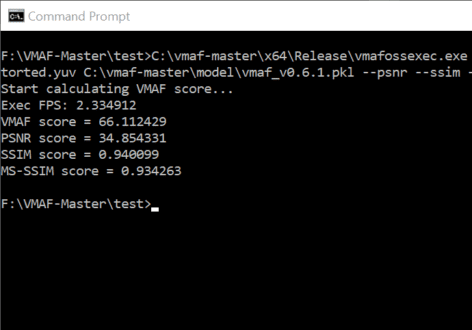
Here’s the command string I used during my recent project. Note that both distorted and reference files are in the same folder which also contains the batch file so there are no paths to either file. Here I’m calling the default model, computing VMAF, PSNR, SSIM, and MS SSIM, and storing the results in a file named distorted.csv, an XML-formatted file with a .csv extension.
C:\vmaf-master\x64\Release\vmafossexec.exe yuv420p 1920 1080 reference.yuv distorted.yuv C:\vmaf-master\model\vmaf_v0.6.1.pkl --psnr --ssim --ms-ssim --log distorted.csv
Here’s what it looks like in the Command window. Once you paste the command line in you’ll see the message “Start calculating VMAF score…”

Figure 4. Computing, waiting, and output.
Then, once the computations are complete, you’ll see the scores in the command window. In my tests, a six-second 1080p test file took about 11 seconds to measure (VMAF-only), compared to about 35 seconds for the MSU VQMT Tool. On my eight-core notebook, VMAF-Master consumed 100% of CPU resources as compared to about 38% for VQMT, so if you were running multiple instances on a workstation the overall throughput of the two programs would likely be closer. Still, for a single instance, VMAF-Master showed very impressive performance. Computing all four metrics as shown in Figure 5, expanded processing time to just over a minute.
Scanning the CSV File
In most major projects, the next step is to open the CSV file and copy and paste the results into a spreadsheet. I don’t like opening the CSV file in Excel because it’s cumbersome, but if you open the XML-formatted CSV in Notepad, you get the gobblygook you see in Figure 5.
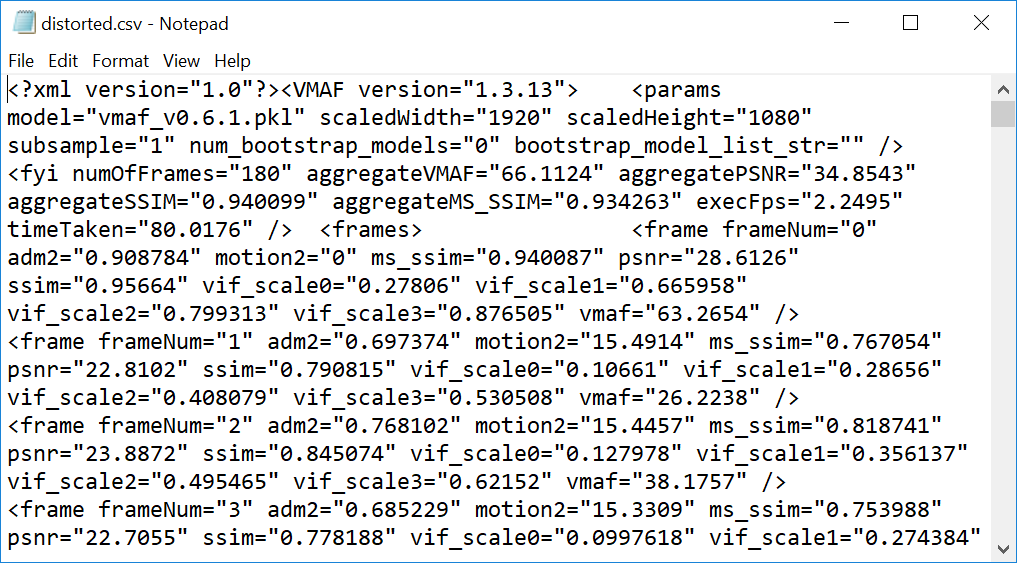
Figure 5. The CSV in Notepad.
My tool of choice for opening and grabbing the data is Notepad ++, a free tool you can download here (Figure 6). As you can see, the tool formats the XML structure and color codes the data, making it easy to find

Figure 6. I prefer Notepad++ for VMAF-Master output.
Deploying the Phone Model
If you can follow the command line in the second batch run in Figure 7, you’ll see that it contains the –phone-model switch. The results in the command window don’t specify that it’s the phone model, though obviously, you can refer to the command string. However, there doesn’t appear to be a phone model designator in the CSV results file, though I may have missed that. So make sure you designate phone-model computations in the file name, otherwise, when you return to your data after a couple of weeks, you may have trouble sorting out which computations were done with the phone model and which without.
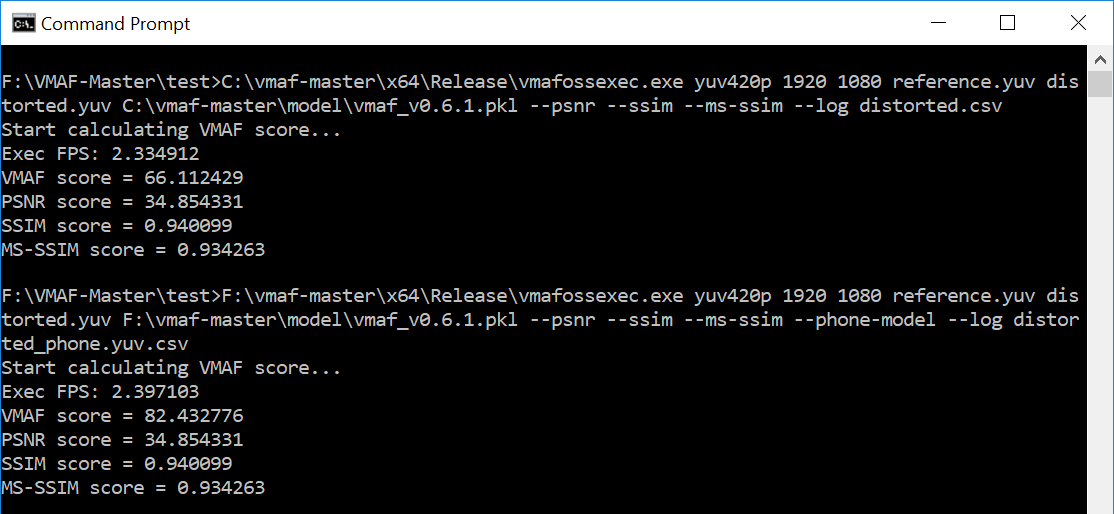
Figure 7. Computing scores with the phone model.
Note that the only score that the phone model designator changed was VMAF; the others are the same, indicating that the phone model computation is VMAF-only. Note also that the score is higher, reflecting that lower quality videos look better on small screens. I explore the implications of this in the blog post, The VMAF Phone Model and Saving on Streaming to Mobile Viewers.
Going Beyond the Basics
This describes VMAF-Master’s most basic functionality. For those looking to automate VMAF-Master, check out the VMAF Python Library which discusses batch operation and other outputs, including JSON. There’s also a reference to an application called ffmpeg2vmaf that allows you to avoid the conversion to YUV step for your reference and distorted files. This page also documents how to create and validate a dataset and train a new model, and there’s a BD-Rate calculator here. It seems as if VMAF-Master is very tightly integrated into the Netflix encoding stack (I’m guessing here) and Netflix is giving you much of what you need to do the same.
What doesn’t VMAF-Master do? Most importantly, as near as I can tell, there’s no way to synchronize the reference and distorted videos if they are out of sync. It doesn’t happen that often, but sometimes an encoder will add or drop a frame and if there’s no way to get the frames in sync, you can’t accurately measure quality. You may be able to work around these issues but it normally becomes a huge time sink. Some tools synchronize files automatically, like Elecard VideoQuest, and the Moscow State tool lets you sync manually in both GUI and batch operations.
The other major deficit is the inability to visualize the output as you see in Figure 8 from the MSU tool, which compares VP9 and HEVC output at 3 Mbps. The overall scores are actually close, with HEVC edging VP9 94.83 to 94.05, an irrelevant difference. However, you see the downward green spikes in the figure which represent short but potentially significant reductions in quality. The VQMT Result Plot lets you spot these problem areas, and by clicking Show Frame on the bottom right, you can actually compare the distorted frames with the reference.

Figure 8. The Moscow State University VQMT Result Plot.
Hybrik Media Analyzer also has its charms (Figure 9). Not only do you get a single-file graph, but you also get the standard deviation of the metric, a valuable measure of quality variability.
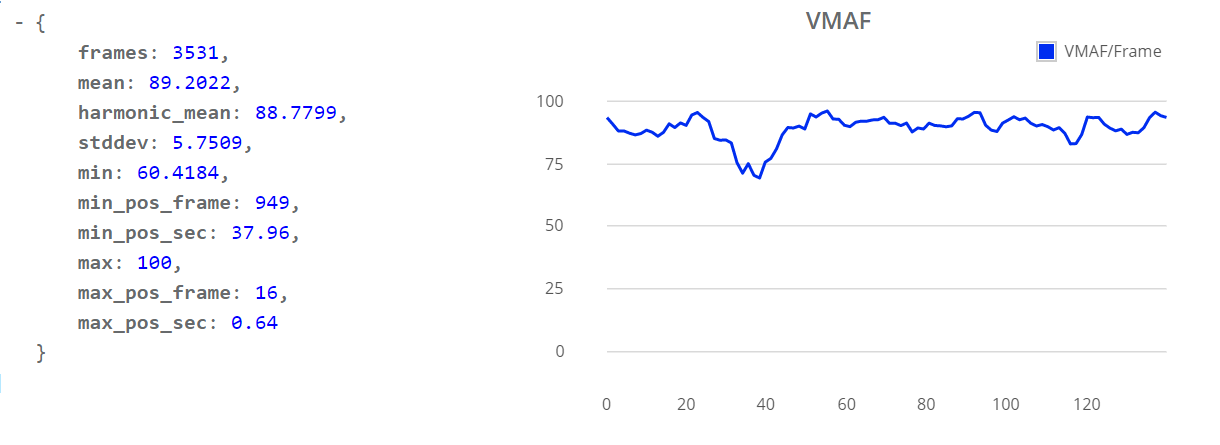
Figure 9. The Hybrik Media Analyzer gives you a graph and standard deviation.
To be fair, frame sync issues seldom occur in a mature encoding workflow, and once in production, you care more about numbers than actual visual comparisons. So while these deficits might hinder VMAF-Master’s use in an experimental capacity, neither impacts its utility within an encoding workflow, which is where Netflix has likely deployed it. If all you’re looking for is the ability to blast out VMAF scores without spending a grand or two, or are looking for a way to tightly integrate VMAF scoring into your encoding stack, VMAF-Master looks ideal.
(Note: Story edited to reflect updated processing times for VMAF only and to add comparisons to the MSU VQMT tool).


