![]()
Livestream Broadcaster is an exceptionally easy to configure and use live encoder that produced very good quality over a range of relevant bandwidths. The only significant negatives are that the unit doesn’t work with the older Livestream system, and doesn’t currently offer adaptive streaming, though Livestream promises to address the latter concern in the near future.
Contents
Out with the Old Livestream, In with the New
By way of background, Livestream is a live streaming service provider, much like Ustream and Justin.tv. If you have a webcam or camera, you can broadcast live to the world at no charge, with advertisements paying the freight. For a minimum monthly fee, you can lose the advertisements. For a background on live streaming service providers, check out “Ustream, Justin.tv, Livestream, and Bambuser: Streaming Unplugged.” For a more extensive Livestream review, check out “Livestream Review: Strong Customization and Social Media Support.“
Livestream is in the middle of a transition between a mature, channel-based service, to a more nascent event-based service. The channel-based service presented a producer with a static channel page and URL that never changed, and all live broadcasts occurred within that page. However, the live stream could be embedded elsewhere, like into your own home page, with a well-featured player with lots of social media support and access to your library of videos. Mobile support was also very well developed for the channel-based service, with apps for iOS and browser-based playback on some Android devices.
The new Livestream is event-based, and each event has a separate page and URL. The experience is much richer and more participatory, as you can upload still images and videos, and make blog-like posts on the event page. However, live streams cannot be embedded during the live broadcast, though after the event, Livestream converts the broadcast into an on-demand file that you can embed. While the live streams are compatible with most mobile devices, the on-demand streams are not. The new service is also much, much cheaper than the old service, with unlimited streaming for $45/month. (Check out this interview with CEO Max Haot for a brief demo.)
Livestream Broadcaster is a standalone hardware device (Figure 1) that works with the new Livestream, but not the old Livestream. The goal of the product was to take the computer out of the equation, simplifying event webcasting and, at $495 with three months of bundled service, making it cheaper to broadcast high-quality video from the road. While those using the old Livestream system will bemoan their inability to use Broadcaster, otherwise the unit more than accomplishes these goals.
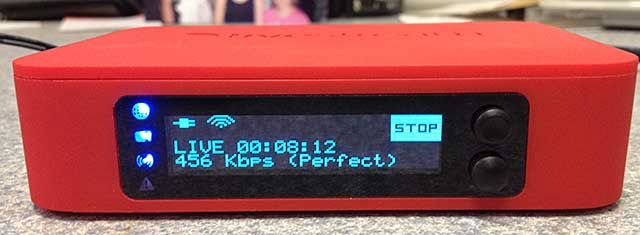
Figure 1. Livestream Broadcaster happily broadcasting away at 456 kbps.
Speeds and Feeds
Let’s start with the feeds and speeds. The hardware itself is 4.8″x3″x1.25″, about the size of two decks of cards wrapped side by side. The front panel houses the blue OLED display with status indicators and joystick and action buttons. All connections are on the back of the unit, with the magnetically connected top coming off to access the compartment which houses three AA batteries. On the bottom are screws for mounting on a supplied tripod connector that you can connect to your camera’s shoe mount.
Livestream also supplies an AC power supply with different connectors for international power sources, a 12″ HDMI to Mini HDMI cable, and a 12″ Ethernet cable. Rounding out the box contents are a cable pouch and a very short quick start guide.
In operation, Broadcaster accepts HDMI video input (1080i/720p/480i) as well as line-in audio, so you use separate audio and video sources. I used 720p for all of my tests, which worked very well. If your camera doesn’t output HDMI, you can use converters like the BlackMagic Design HD-SDI to HDMI converter to produce the required HDMI signal.
You drive Broadcaster via the joystick and action buttons on the front panel, but once it’s online, you can control operation from your desktop on Livestream.com or via a free iPhone application. On the output side, Broadcaster produces H.264 encoded video in the Baseline and Main profiles, with AAC audio. At the moment, Broadcaster encodes a single selectable bit rate, so you can’t currently produce for adaptive streaming with this device. However, Livestream says it will introduce a for-fee cloud transcoding service in the “near future” to enable adaptive streaming.
The unit can transmit via a wired Ethernet connection, over Wi-Fi, or via 3G/4G modems that connect via USB. I tested with both Ethernet and Wi-Fi, but not with a 3G or 4G modem. According to the Livestream FAQ, the unit has been tested with four modems that Livestream will support (Verizon Pantech UML290, T-Mobile Jet 2.0, AT&T USBConnect Momentum, and Clear Stick Atlas). While other modems may work, they won’t be supported by Livestream, which means you’re on your own if problems arise.
Battery life depends upon the batteries that you use, your video configuration and connection to the Internet. For example, using Energizer Ultimate Lithium batteries, you get 4.5 hours for normal video when connected via Ethernet and WiFi, but only 2 hours of life when connected via 4G. When encoding HD video, you can transmit via Ethernet for the same 4.5 hours, but Wi-Fi transmission life drops to 3.75 hours.
In contrast, with Energizer rechargeable batteries, you get a maximum of 2 hours for normal video via Ethernet and Wifi and 1 hour of normal video pushed via 4G. When broadcasting HD video with these batteries, you get 2.3 hours via Ethernet and 2 hours via Wi-Fi.
Setting Up Livestream Broadcaster
Livestream has done an excellent job simplifying Broadcaster setup. Once you get the unit, the quick start guide advises you to power the unit up, then get connected. The OLED display shows four lines at a time, and you navigate through the menu using the joystick button on the bottom right of the unit, and action button on the top right (Figure 2).
If you’re using Ethernet, you just plug in a cable. If Wi-Fi, the unit identifies available connections and you enter the passcode, which is stored in nonvolatile memory, so it survives if you remove the batteries and completely power down the unit. Note that early units had issues storing these passcodes under some circumstances; Livestream says these have been mostly resolved.
As you can see in Figure 2, there are four status indicators on the left of the unit. The top indicator shows that you’re connected to the Internet, the second that your camera is attached and video is detected. When you go live, the third indicator will light up. The fourth indicator is an alert that appears when you’re attempting to stream live and the signal has dropped, as might happen if you lose connectivity in the middle of a broadcast.
OK, back to the startup procedure. Once you get the Broadcaster connected to the Internet, the unit gives you a URL and pairing code (Figure 2). Go to the URL and enter the code and Livestream “pairs” your account to the Broadcaster encoder. If you don’t have an account, you can create one, entering a voucher code from the quick start guide for the first 3 months. You will be required to provide a credit card, though it won’t be charged until the fourth month.
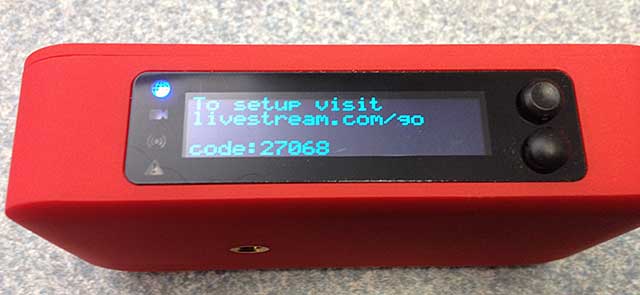
Figure 2. Getting connected is very simple; just navigate to that URL and enter the code.
Once your unit and your account are paired, you can start broadcasting. I’ll review the procedure for doing that after describing the Broadcaster’s menu structure.
Note that once you get connected, you can drive much of the functionality that I’m about to describe from the Broadcaster unit itself, from the Livestream Broadcaster app on your iPhone or from your Livestream profile page on the web.
As mentioned at the top, the new Livestream is event-driven, so it’s no surprise that the first option in the Broadcaster menu is to choose a previously configured event-you can’t create an event using Broadcaster. Click this option and Broadcaster connects to your Livestream account and shows all available events. The next menu stop in the Broadcaster menu is for Quality, with five options; Mobile (198Kbps), Normal (446Kbps), Medium (646Kbps), High (1.6Kbps) and HD (2.3Mbps).
The next setting lets you choose the configuration (e.g. 720p, 1080i) and aspect ratio of your incoming video; or you can choose Auto and let Broadcaster figure it out, which is what I did. The next option lets you choose the source of incoming audio, so you can input audio from the line in even if your video is coming in via HDMI.
The next option lets you change and configure your internet connection, the next lets you see your account settings, and the final lets you unpair your Broadcaster from the Internet, which essentially lets you reset the status and start anew. Overall, the controls are fairly limited; for example, you have no granular control over video configuration, just the ability to choose a preset. Still, this simplicity should work well for the non-technical user that Broadcaster is designed for.
Now, let’s look at how to produce an event with Broadcaster, then we’ll conclude with a look at video quality. Rather than show you more LCD screens from the Broadcaster unit, I’ll produce the event from my iPhone and show screens from there.
Going Live on the New Livestream
Again, the first step is to create an event, which creates a separate page for your live event (Figure 3, left side). To this page you can add tags and links. You can create the event as a draft event, which only you can see, or publish the event to make it public. For the purposes of this demonstration, I created an event called “iPhone driven.”
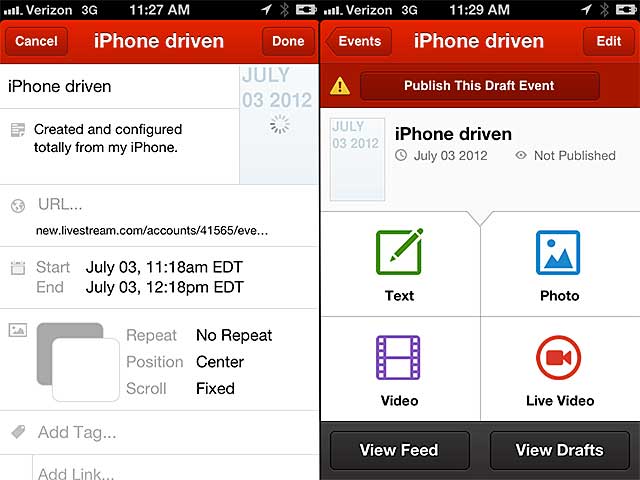
Figure 3. Creating an event (on the left) and controlling the inputs.
After creating the event, you click to the event page (right side, Figure 3), which shows four content types: text, photo, (on-demand) video and live video. Click live video and you should see the Broadcaster unit as one of the available devices. Click that, and you’ll see a preview page with a video frame updated every five seconds as a preview (Figure 4). An options menu off that page gives you access to the quality presets and audio configuration screen to change audio inputs.
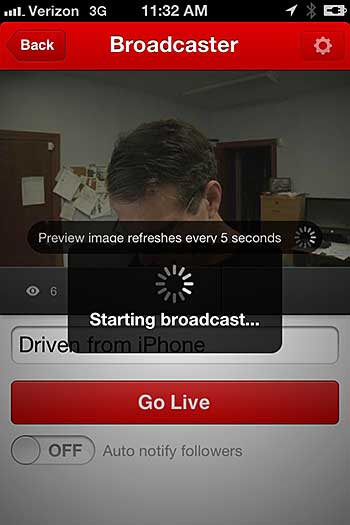
Figure 4. Starting the broadcast from my iPhone.
You start the broadcast by clicking Go Live as shown in Figure 4. Once live, all status messages that appear in the Broadcaster OLED panel also appear in the iPhone app, though with much more specificity. For example, the error message “Slow Internet” that appears on the Broadcaster hardware when your connection is too slow for the selected preset gets expanded on your iPhone to “Your Broadcaster does not have enough bandwidth for the selected quality. Would you like to stop streaming so you can lower the quality?”
During the event, you can add text, disk-based videos, and pictures via the menu options shown on the right in Figure 3-just click the appropriate button and follow the prompts. You can stop the live broadcast via menu commands on the Broadcaster, using the iPhone app or via the browser. Once you stop the broadcast, you can elect to post the video to the event page, keep it as a non-posted draft, or delete the video. Note that you can broadcast multiple times to a single event, though all content already on the page will remain there unless you delete it manually.
While streaming live, I tested playback on an iPad, iPhone, and Android-driven Toshiba Thrive; all played the stream with no problem. None could play the on-demand stream that Livestream produced after the event, displaying the following message, “This video is currently unavailable on mobile. We are working hard at making videos on the new Livestream mobile compatible.”
Impressive Quality
On the quality side, I was very impressed. The highest quality level that my outbound DSL could sustain was Normal, which was 512×288@30 fps at a combined audio/video data rate of 446 kbps. You can see a stream that I created at this configuration, and while the talent is kind of rough, the audio and video quality is excellent (Figure 5).
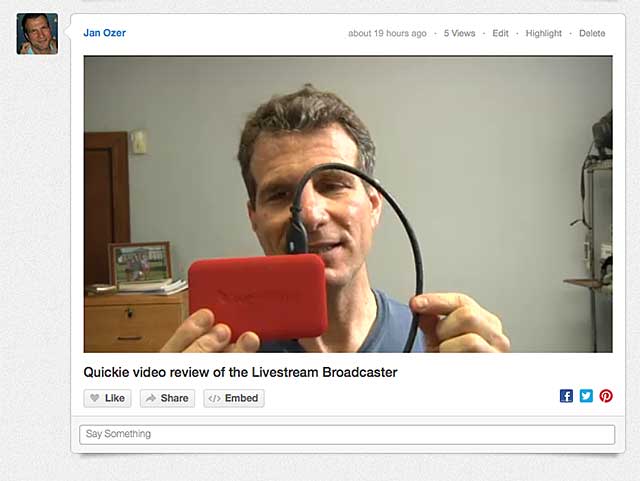
Figure 5. You can check out this scintillating video. This video encoded using the Normal quality level.
Livestream was kind enough to encode one of my standard test files to each of the five presets so I could gauge output quality on more demanding footage. You can see the results, though they will only be up until the end of August, 2012. Analyzing the files, I found the five presets used the configuration options shown in Table 1. You can tell from the bits per pixel values that some of the files will look pretty good irrespective of the motion content in the video (e.g the High setting) while some will look pretty bad if there’s any motion in the video (e.g the Mobile setting).

Table 1. Video configurations of the five Broadcaster presets.
If you look through all five videos, you’ll notice that lower-motion sequences generally look pretty good, but that the one-second dissolve looks awful at lower data rates-one of the reasons I prefer straight cuts for most transitions during live events. Overall, quality is right where it should be for live encoding of mixed source footage at the configurations shown in the Table.
Livestream looked at my table and made several points. First, that Broadcaster will always produce the sample rate input into the encoder, because it has no conversion function. If you input 48 KHz, you’ll output 48 KHz. Second, the bitrates reported by MediaInfo were incorrect, and will vary by the number of channels in the stream. Livestream reported that for the Mobile setting, Broadcaster will produce 24Kbps for mono, 48Kbps for stereo, along with 48/96Kbps for the Normal setting in mono/stereo, 64/128Kbps for Medium, 128/256Kbps for High and 160/320Kbps for HD.
This is Livestream’s first encoder, and some users may be concerned about rookie errors in quality, stability, or product longevity. In this regard, though Livestream has not confirmed the relationship, Broadcaster appears to be separated at birth from the highly regarded Teradek Cube and video analysis tool MediaInfo lists Teradek video as the “video device” produced by Broadcaster. Obviously, Broadcaster shares some heritage with the Teradek Cube-and the two companies had a well-publicized partnership at NAB-which should provide some comfort that operation should be top notch with unparalleled ease of use within the new Livestream ecosystem.
 Streaming Learning Center Where Streaming Professionals Learn to Excel


