Wildcards let you to encode and package multiple files using a single script. This article teaches you how to create and run bash scripts that use wildcards on Ubuntu and the Mac. The overall schema discussed can create a simple and inexpensive per-title encoding facility.
Whenever I test codecs or encoders, I customize the encoding ladder for each test video so that most output files are in the 85-95 VMAF range, which is typically the quality level for the top quality file in an OTT encoding ladder. Producing custom ladders for each file is time consuming, of course, and error-prone, so for a recent project that involved 25 test files, I decided to create 8 encoding ladders in templates with the top rungs ranging from 1 – 8 Mbps. I planned to allocate files to a ladder by encoding at -crf 23 like so and measuring the average data rate and VMAF score.
ffmpeg -i input.mp4 -crf 23 output_crf23.mp4
So, if the average data rate of output_crf23.mp4 was 3 mbps, and the VMAF was 94, I would assign it to the template that peaked at 3 mbps. If the VMAF score was much higher, I would consider using a more aggressive ladder.
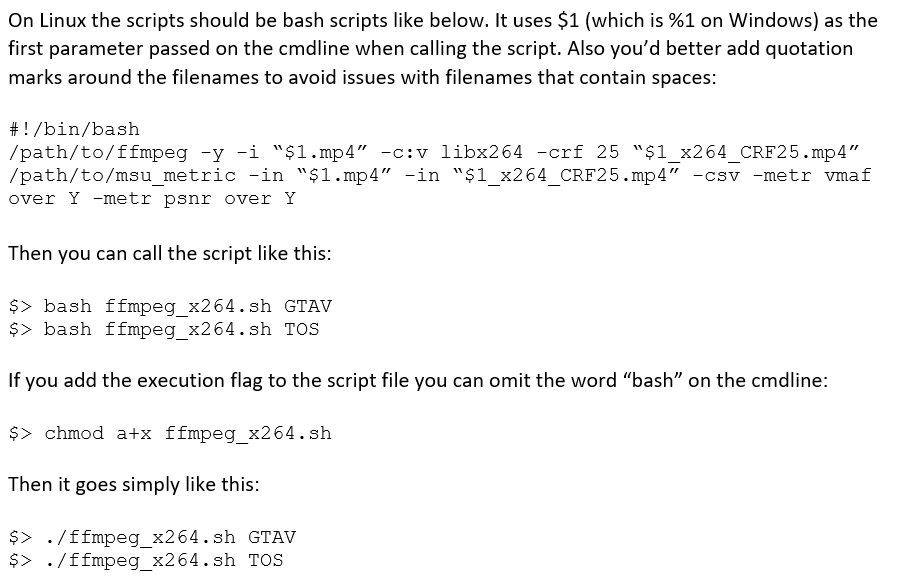
In terms of operation, I know how to use wildcard characters in Windows as I explain in this article. I was performing this project on an AWS Instance running Ubuntu, however, so I needed to learn how to use wildcards on Ubuntu, and if I got that working, to test the Mac as well. I researched for a bit and found nothing on point, so I reached out to a few colleagues who are familiar with bash scripting on Ubuntu. Thomas Kramer, VP of Product Management at MainConcept, sent back the following Mother Lode of information.
Thanks, Thomas, for this great explanation, let’s put it to use. Step 1 is creating the batch file with the wildcard character. Let’s start there.
Creating the Batch File with Wildcard
Here’s the first few lines of the batch file that I created. I suggest you create this batch using a real file name, since you may have to debug different switches along the way and FFmpeg won’t know what to do with $1.mp4 from the command line. Once it’s up and working, run a search and replace to swap $1 for the test file name.
Line 1 is the Shebang.
Line 3 creates uses the wildcard to create a folder for the output files for all video files.
Lines 5 and 7 use the wildcard to run first and second pass encodes in FFmpeg. I never include spaces in file names so I didn’t use the quotes that Thomas recommended. Note that you can run any command line accessible program from this script, including a packager like Bento4, which I show how to use here, or to run a quality metric computation as I did in my script for this project. So, if you want the output to be a full set of packaged HLS or DASH files for uploading to a server it’s easy enough to do.
Creating the Batch File to Execute the Scripts
The next step is to create the batch file that matches the test files and encoding ladder script. I used the first technique suggested by Thomas for my batch file, which looks like this and was named script.sh.
I used the following two commands to execute the script.
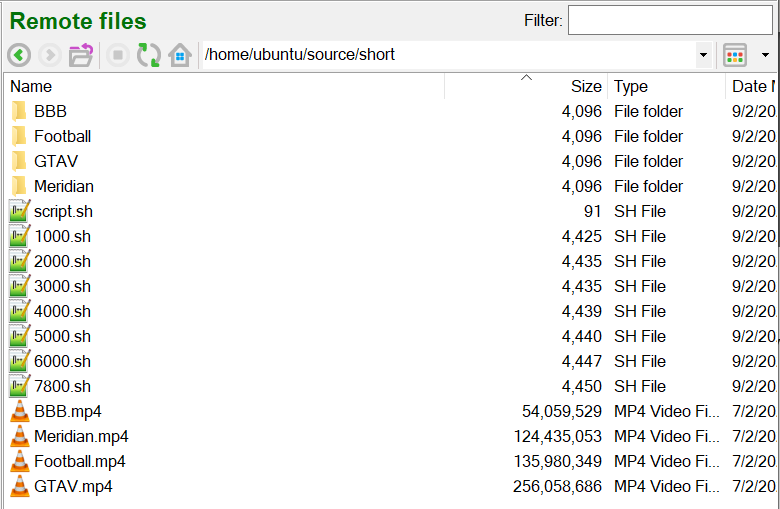
This produced the following folders and files on the Amazon Ubuntu instance.
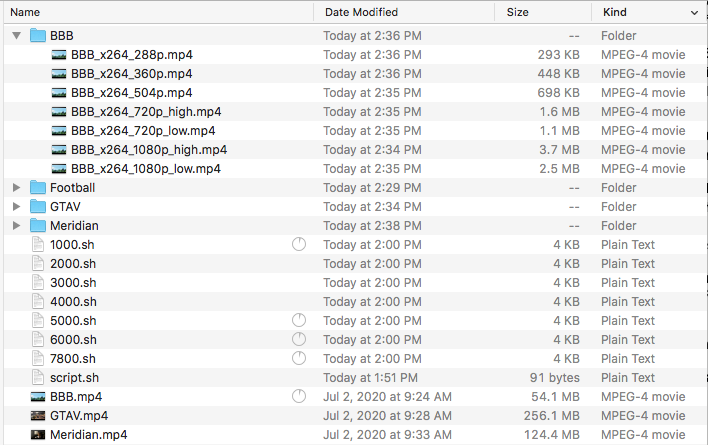
And on my Mac.
With this done, it was a simple matter of running the CRF 23 encodes, measuring the bitrate, and assigning the ladders accordingly. Note that if you’ve encoding manually in a fairly low volume environment, you can use this technique to produce a primitive but effective form of per-title encoding.
Thanks again to Thomas for sharing his knowledge, I hope you found this useful
 Streaming Learning Center Where Streaming Professionals Learn to Excel


