 Streaming Learning Center Where Streaming Professionals Learn to Excel

Related Articles


I recently produced a webinar on YouTube Live using Telestream Wirecast, and wanted to document the experience. This isn’t a full, bang-it-till-it-breaks comparative review, it’s more of a CliffsNotes pictorial of what’s available and how to use it.
Contents
Making the Grade
As you may know, YouTube Live isn’t available to all comers; you need an account in good standing and (reportedly) a certain number of followers and video views. You can read about the requirements, though followers and video views aren’t mentioned. I didn’t meet the requirements, but Telestream, the developer of Wirecast for YouTube, petitioned the powers that be at YouTube, who enabled my account.
Getting Started
Once you’re enabled, access live event functionality from the Video Manager page (Figure 1). Click Live Events on the left to open a screen providing access to all live, upcoming, or completed events. Or, click New live event on the upper right to create a new event.

Figure 1. Creating a new live event
Not surprisingly, creating the event involves inputting most of the same parameters that you input when uploading a file to YouTube. On the right in Figure 2, you can see that you can send a post to your subscribers and also share via Google Plus, Facebook, and Twitter, a nice way to publicize your event.

Figure 2. Inputting the basic webinar info
On the top left of Figure 2, you should be able to make out the Advanced settings tab. Click that to expose the settings shown in Figure 3. Most notably, you control whether or not comments are moderated and whether or not live events can be embedded. Obviously, if you enable embedding, you can embed the event into your own website in addition to showing it on your YouTube watch page, a feature not available in all competitive services.

Figure 3. Advanced configuration parameters for your event
Choosing Encoding Parameters
By design, YouTube Live inputs a single stream from your onsite encoder, and converts that into multiple streams. The number of streams created and their respective data rates depends upon the stream that you send YouTube. You set this in the Ingestion Settings shown in Figure 4. The radio button hidden by the drop-down box is to configure your own custom ingestion settings, which I didn’t mess with.

Figure 4. Setting the basic ingestion settings
Once you choose Ingestion Settings, it’s time to configure your settings into your streaming encoder. This will be automated if you use Wirecast for YouTube or the retail version of Wirecast, and semi-automated if you use the Adobe Flash Live Media Encoder. Specifically, you choose your encoding tool via the drop down list shown in Figure 5.

Figure 5. Choosing your streaming encoder
If you choose Wirecast for YouTube, you’ll be offered download links for the product (Figure 6), and for retail versions. Note that if you download the free version, it will uninstall any currently installed versions of Wirecast. I used the retail version for the webcast, and didn’t want to disrupt that, so I didn’t download and install the free version until after my webinar.

Figure 6. Your options for Wirecast on YouTube Live
Once I did, I learned that operation is similar to the retail version of Wirecast, except that your only destination is YouTube and your only presets are YouTube-related. You can upgrade the free version into either paid version by paying the fee and inserting the serial number into the preferences panel.
In the retail version of Wirecast, which I used, when setting your broadcast settings, you’ll choose YouTube as the destination. In both versions, when you press Authenticate, Wirecast will ask you to log into YouTube (Figure 7), and YouTube will ask you for permission to let Wirecast manage your YouTube account.

Figure 7. Autoconfiguring YouTube into Wirecast
Once granted, YouTube Live passes all server address information and other coordinates into Wirecast, so you don’t have to set them manually. Just choose an encoding preset that matches the ingestion settings that you selected in Figure 4 and you’ll be good to go. It’s pretty slick, and I’m guessing you’ll see this level of integration with more and more live encoding tools. Note that there’s a Wirecast for Youtube channel with videos detailing these basic configuration operations and much more.

Figure 8. Once YouTube Live and Wirecast finished chatting, I was ready to go.
Moving on to other encoders, if you choose the Flash Media Live Encoder, YouTube Live will also provide download links for the Windows and Mac versions, along with downloadable XML files you can input into FMLE to handle configurations and connections.
If you choose other encoders, you see the information in Figure 9. If you click Recommended Settings, you’ll see a table of suggested encoding parameters. The stream name and primary and secondary URLs are the typical information provided by streaming service providers and should be simple to configure into any streaming encoder. Note that YouTube Live does support captioning, though you’ll have to supply the caption feed to the service. Overall, YouTube does a great job making the new service easy to use with Wirecast and FMLE, while those using other encoders should have no problem figuring out how to connect.

Figure 9. Here’s how you configure YouTube Live for other encoders.
After you input the info and settings, YouTube Live creates the watch page for your event, shown in Figure 10. This is the page you can send your viewers to in the blog posts, emails, and other materials you use to market your live event. As mentioned, you can grab embed codes to embed the live event into your own website, but the player is somewhat defeatured, lacking the countdown clock and comments. On the plus side, only your video is shown — not the playlist shown on the right in Figure 9 — and there were no advertisements on my embedded player.

Figure 10. Here’s the player on YouTube. The embedded player lacks comments and the countdown.
Practice Makes Perfect
Once you have your event set up, you enter the Live Control Room. You’ll immediately see a message saying either that your stream isn’t live or that it is (Figure 11). There are two video windows below the screen shown in Figure 11: one a preview screen that you can use at any time before the event, and the other a Public View showing the actual live stream. Click Preview and the preview starts playing. When you do, the Preview button changes to the Start Streaming button. Click that and you’re off.

Figure 11. The Live Control Room from which you can preview and take your program live.
The preview and going live functionality works fairly well, but not flawlessly. Preview took several minutes to get going, and I had to refresh the page to make it work. Once preview started, however, it streamed continuously without interruption. In my tests, though I was transmitting a 720p stream to the service, the preview stream maxed at 360p, which makes sense from YouTube’s standpoint, and is adequate for the preview function, but makes you wonder what happens when you go live. I checked, and the actual broadcast maxed at 720p, as advertised. Overall, the preview function provides a nice mechanism for fine-tuning lighting, audio, and video settings, which I did for about two hours before the actual event.
Going live was a bit of a leap of faith, which is endemic to all live streaming services, though not to the same degree. Specifically, there was about 45 seconds of latency between broadcast and playback, compared to about 10 to 15 seconds for other services that I’ve used. Once I clicked the Start Streaming button, I saw nothing for 45 seconds in my Public View window, but had to start talking right away and assume it would all neatly show up 45 seconds later. It did, and overall, the webcast went off without a hitch.
Creating and Encoding the Webcast
So far, we’ve talked solely about the plumbing that enabled the webcast, not the webcast itself. I produced the webcast in Wirecast, and the video stream consisted of three elements shown in Figure 12: the PowerPoint on the left, the picture-in-picture video on the right, and the audio feed from the camera. You see the two video components in the preview panel in Figure 12, with the audio inserted as stream C in the sources panel on the lower left.

Figure 12. Building the webinar in Wirecast
To give credit where credit is due, the idea came from Streaming Media Producer editor Stephen Nathans, who had crafted a composition similar to this in Adobe Premiere for presenting seminars from Streaming Media conferences. During the week before my webinar, he and I chatted about how to create a similar look to present the Streaming Media conferences live, which prompted me to compose this shot in Wirecast, which took all of about two minutes.
For the record, I produced the event on an ultra quiet HP Z400 workstation, with HDMI audio/video captured by a Viewcast 820e card from my Panasonic AG-1HMC150 camcorder. I used an Audio2000S wireless lavalier microphone to supply audio to the camcorder. The PowerPoint slides came from a MacBook Pro communicating to Wirecast via Telestream’s free Desktop Presenter module that links the two computers over Wi-Fi. It’s a pretty slick setup. Though you can’t produce it in the free Wirecast for YouTube version, I’m pretty sure that the $199 upgrade price gets you these capabilities. If not, the $495 retail version of Wirecast that I used obviously can.
You can view the webinar itself, with Figure 13 showing how the archived version of the webinar looks on YouTube. As you can see, the blank area behind the video is simply presented as black, and doesn’t show the checkerboard pattern shown in Figure 12. I’m sure Nathans will figure out a better use for that black area; perhaps some logos or sponsored advertisements, which is a thought for my next webinar. Overall, this layout seemed a nice way to integrate the extensive information shown on the slides with the talking head.

Figure 13. The archived webinar on YouTube
In the making it look easy department, Figure 14 shows the physical setup. On the right (my left), you can clearly see the two lights — one a CFL softbox lighting the background and the other an Adorama LED panel serving as one of two dual key lights — on me. I duplicated this with two CFL softboxes on the left (my right), though they are much harder to see. The HP LP3065 31-inch monitor in front of me is from the Z400, and displayed the Wirecast controls, including the preview window with the PowerPoint slides that I cued during the broadcast. The Mac with the actual slides is on my right, with an HP 8760w notebook on my left which I used to preview the webcast before I kicked it off.

Figure 14. Here’s the physical setup.
Perhaps the lighting and computer setup is overkill, but with video it’s always in for a penny, in for a pound, and if it’s worth doing it’s worth overdoing. Insert your own platitude here. Since sub-par audio/video quality will definitely detract from the effectiveness of your webinar, it’s worth doing everything you can to ensure high quality throughout.
After the Webinar
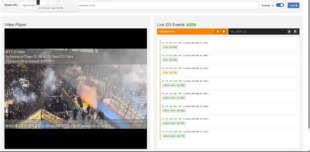
Enough about me, let’s get back to YouTube. After the webinar, you get immediate access to the statistics shown in Figure 15, which includes peak concurrent views, the number of playbacks, and the data rates in which the video was viewed, with various filtering options, including the ability to filter views by source page (YouTube or your own embedded player). At a peak of 37 concurrent viewers, I didn’t expect to strain the YouTube delivery infrastructure. There were no complaints from the viewers during the event, which hopefully indicates that there were no serious problems.

Figure 15. The analytics enabled by YouTube Live
During the event, my eldest daughter monitored the event successfully on both an iPhone and iPad, though the event wouldn’t load on her old Android phone, an HTC Rhyme. I did test playback of another live event on my Toshiba Thrive Android tablet, which worked fine, so the problem isn’t all Android devices and (don’t tell my daughter I said this) could have been user error. If Android playback is important to you, test it yourself once you get access to the YouTube Live system.
Once the event is over, it immediately becomes available for on-demand playback, and you can edit the video using the same controls available for uploaded videos.
Impressions Please
YouTube Live is technically advanced, one of the few live systems that includes on-the-fly transcoding of the input stream, with proven support for iOS and desktops (and probable support for Android, just not proven by me). The service is advertising supported, so you may not like the advertisements that appear on or near your video, though I saw no advertisements on the player embedded in my website. While YouTube branding appears on all players, that certainly that doesn’t carry the stigma that it used to, given the legions of top websites that use YouTube to deliver many of their on-demand streams.
While I shudder at the thought of trying to reach YouTube tech support in the event of a problem, the company has done an extremely good job at making its service useable, and other than the minor preview issues mentioned I had no problems at all. The biggest problem for most producers is that YouTube hasn’t opened the service for everyone, though in the long run it’s better to roll out the system slowly to ensure consistent performance.
A comprehensive comparison between YouTube Live and systems like Livestream and Ustream will need to wait until YouTube Live becomes commercially available to all users. At this point, we don’t know if the service will be free or what the final feature set will be. I can say, however, that I was impressed; YouTube has created a highly usable system that worked well in my limited application.


