Streaming Learning Center Where Streaming Professionals Learn to Excel

Related Articles


Contents
This tutorial was sponsored by Vislink and produced by Streaming Media in conjunction with Jan Ozer and Streaming Learning Center for the Streaming Media Cellular Newsgathering Field Guide.
Transmitting video via 3G, 4G and LTE cellular connections opens new opportunities for organizations engaged in mobile Internet News Gathering (iNG), or those who want to broadcast video from sporting events, remote meetings or anyplace where Ethernet and Wi-Fi are not accessible.
If you’re in the market for a portable video encoder/transmitter, you should consider the LiveGear Airstream from Vislink, who’s been in the broadcast business for over 50 years. The product is mobile, easy to use and employs predictive forward error correction and adaptive bitrate H.264 encoding to reliably deliver top quality video over broadband cellular networks.
In this tutorial, I’ll introduce you to the Airstream system and show you how it is used to broadcast live video anytime, anywhere.
Hardware Tour
The Airstream is an integrated H.264 video encoder and broadband cellular transmitter, which you operate via a touchscreen panel (Figure 1, below), making it totally self-contained, and easy to use and transport.
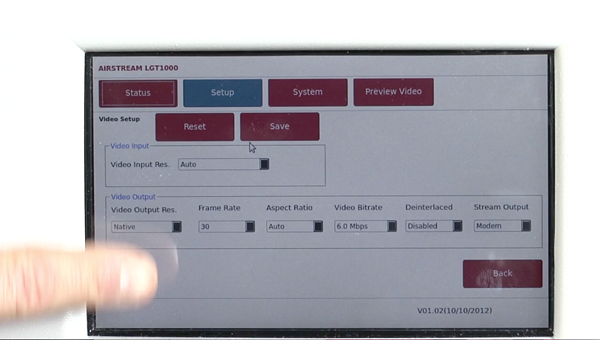
Figure 1. The Airstream touchscreen
In the current version, you can install up to four internal 3G, 4G or LTE modems via SIM cards (Figure 2, below), so there are no external dongles to carry and manage. The fifth modem is a control modem that can be used to create a virtual private network. Each transmission modem is connected to its own broadband antenna that is neatly stowed behind the AirStream’s front panel. This antenna is for the control modem.
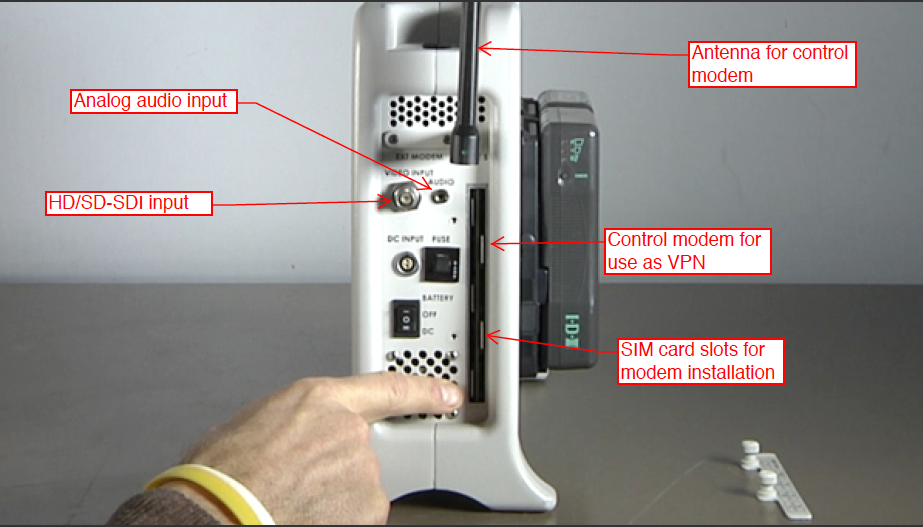
Figure 2. The Airstream’s right-side panel
You can mix and match SIM cards from different cellular providers to ensure that you get a reliable signal, and the unit will bond all modem connections together delivering the maximum bandwidth possible.
The unit also features an HD/SD-SDI video input with embedded audio input. A separate analog audio input is also available.
On the left panel are an Ethernet port and an SD memory card for local storage (Figure 3, below) that will be available for use with version 1.03.
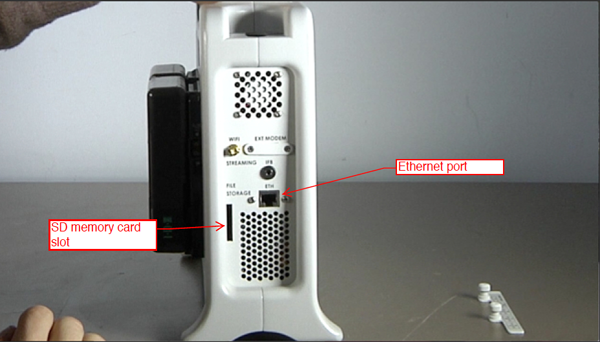
Figure 3. The Airstream’s left-side panel. Note that called-out features will be available for use in a future firmware upgrade.
On the back is room for two industry-standard IDX Lithium-ion batteries (Figure 4, below), which deliver up to 6 hours of broadcasting. They’re hot-swappable, so if you need extra time without disrupting your transmission, just bring extra batteries.
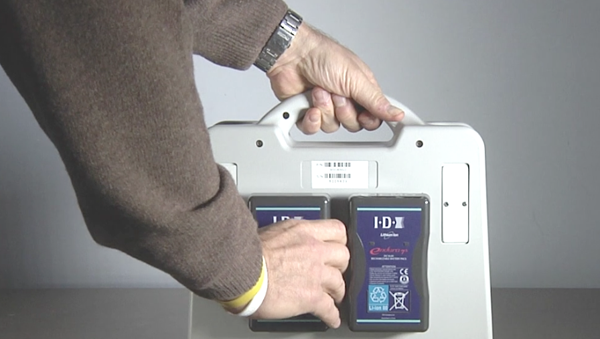
Figure 4. Hot-swappable Li-ion batteries on the back.
Technology Overview
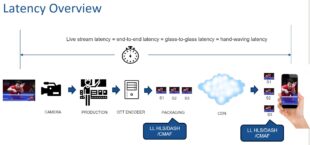
As an overview, the Airstream encodes HD or SD video into H.264 IP format and then splits the transport stream up for transmission via the available modems (Figure 5, below). All segmented streams are directed over the cellular broadband networks and the internet to an LGR-1000 receiver located at your operations center.
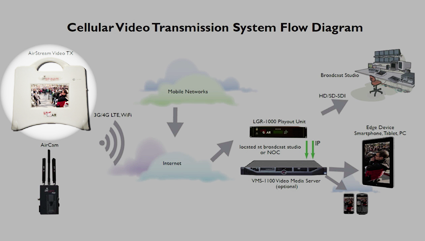
Figure 5. Transmitting the transport stream
The LGR-1000 (Figure 6, below) aggregates by reassembling the four segmented streams into a single coherent IP video stream which is decoded to an SDI signal that you can plug into your existing video processing infrastructure.
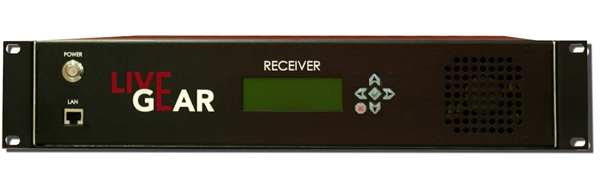
Figure 6. The LGR-5000
At your option, you can purchase the VMS-1100 video media server (Figure 7, below) to transcode the IP transport stream from the LGR-1000 for delivery to desktops, smartphones, and tablets.

Figure 7. The VMS1100 media server
If you’re interested in a smaller, more portable product, note the camera mounted LiveGear AirCam unit shown in Figure 8 (below), which supports up to five cellular connections in a much smaller form factor.

Figure 8. LiveGear AirCam
Configuring the Airstream
Most AirStream customers configure the unit in the office to make field operation as simple as possible. You can configure the Airstream using the touchscreen, or by connecting to the unit from a separate computer on the same network, which shows the same basic controls.
Figure 9 (below) shows the configuration process with a separate computer. (The process works just as well with the touchscreen, but computer-based configuration is easier to illustrate.) To begin, if you haven’t done so already, configure the cellular modem SIM cards that you’ve installed.
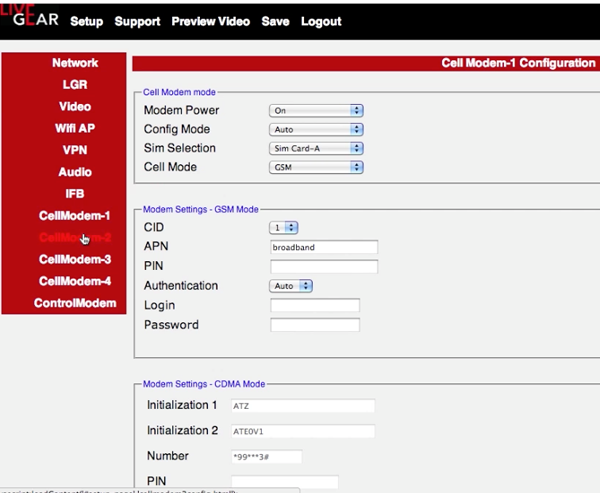
Figure 9. Configuring the installed cellular modem SIM cards.
To connect to a remote Airstream unit from behind your office firewall, you can setup a virtual private network which is managed via the internal control modem. You should also configure these settings for the LGR receiver.
Next, you’ll complete the video configuration. Leave input resolution at Auto. You can set the maximum bitrate as high as you’d like, up to 10 megabits per second since the system will adaptively adjust the data rate to match the available cellular bandwidth (Figure 10, below).
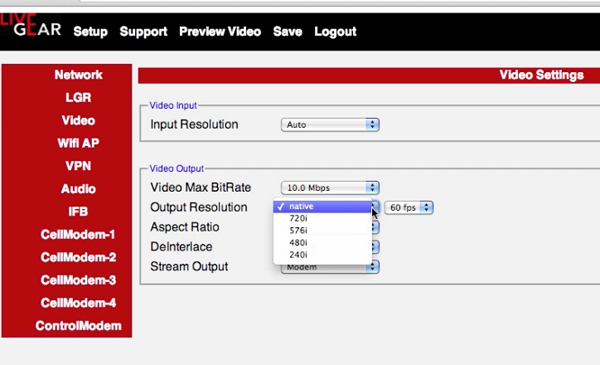
Figure 10. Configuring video settings.
Set the rest of these controls as you would normally, and choose Modem as the Stream Output for cellular transport. Starting with version 1.03, the unit will also be able to transmit via Wi-Fi or wired connections, increasing its flexibility.
Then save the configuration via the panel at the top of the screen.
Audio controls are also simple: choose the input, bit rate, input type, and channel type. Choose whether to enable automatic gain control and configure your options (Figure 11, below). And save these settings as well.
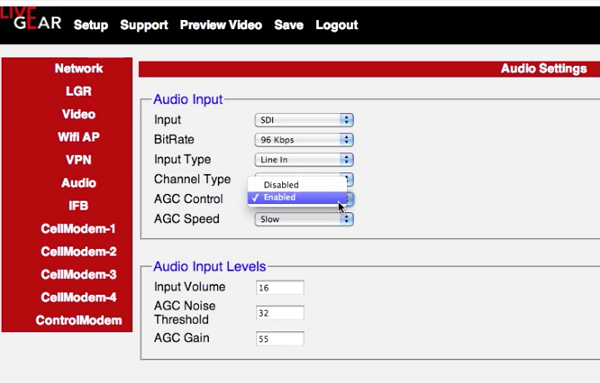
Figure 11. Configuring video settings.
The saved settings become the default until changed. Again, if necessary, users in the field can change these settings via the touchscreen panel. Or you can log into the airstream remotely via the VPN that you just configured.
Field Operation
In the field, the user sets the unit down, connects the antenna, attaches the batteries, connects the camera, and turns the unit on, which takes about 2 minutes for booting and to optimize the cellular links (Figure 12, below).
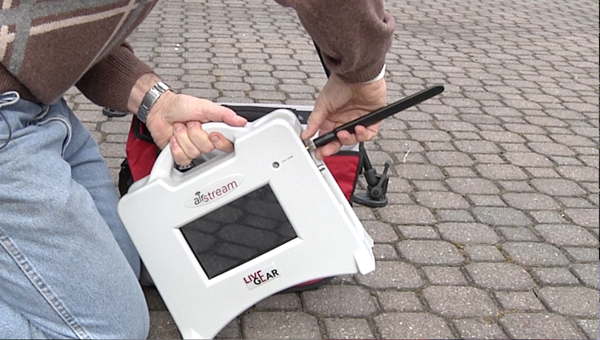
Figure 12. Preparing the unit for use in the field.
Finally, you need to check Cellular Status (Figure 13, below).
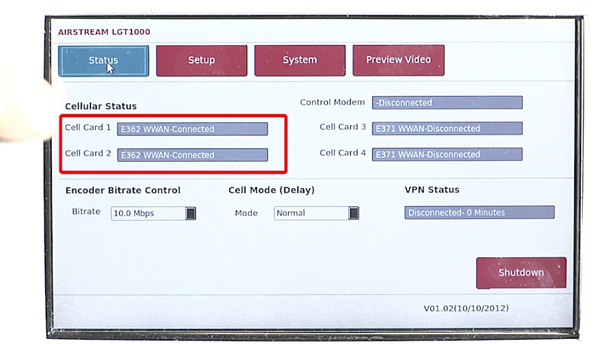
Figure 13. Checking Cellular Status using the touchscreen.
There is no start button; the Airstream will start transmitting as soon as it sees an incoming video signal, which you can see by clicking over to the Preview Window (Figure 14, below).
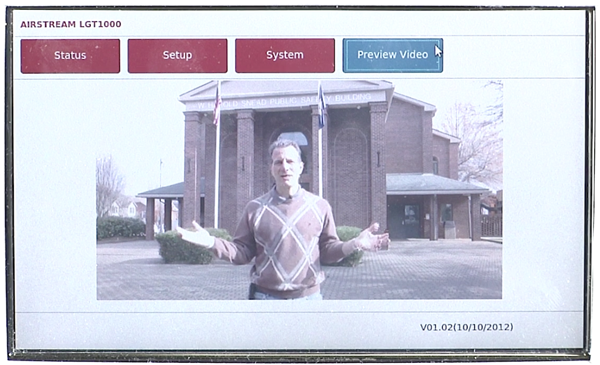
Figure 14. Previewing your output
Again, the Airstream encodes the signal into an H.264 format using adaptive bit rate processing to match the available cellular throughput. Predictive forward error correction helps ensure video quality and continuity if your broadband cellular service hiccups.
The multiple segmented signals are sent to the LGR-1000, which in turn aggregates and reassembles the IP packets for decoding into an SDI signal, or to pass to the VMS-1000 video media server for H.264 streaming from your website for delivery to desktops, smartphones, and tablets.
So that’s it. The Airstream is compact and easy to use, and can run for as long as you have batteries to swap in. It can support up to four broadband 3G, 4G, or LTE modems to supply satellite-quality video at a fraction of the cost.
It’s live video—anytime, anywhere—from Vislink.